Nvidia has been making GPUs for quite some time now, and the brand is pretty popular among gamers and content creators alike for its newest RTX lines of graphics cards that offer pretty decent performance.
However, making the hardware is only half the story. As good as your GPU may be, you need stable drivers to help it integrate into the operating system. In this article, we’re taking a look at how to update your GPU driver.
Also read: Nvidia GeForce Experience not working: 4 Fixes
Updating Nvidia drivers
There are two ways you can update your GPU drivers.
We’ll be going over both methods.
Using the Device Manager
Using the device manager allows you to keep an eye on all drivers to any peripheral on your PC. Here’s how you can update your Nvidia GPU drivers.
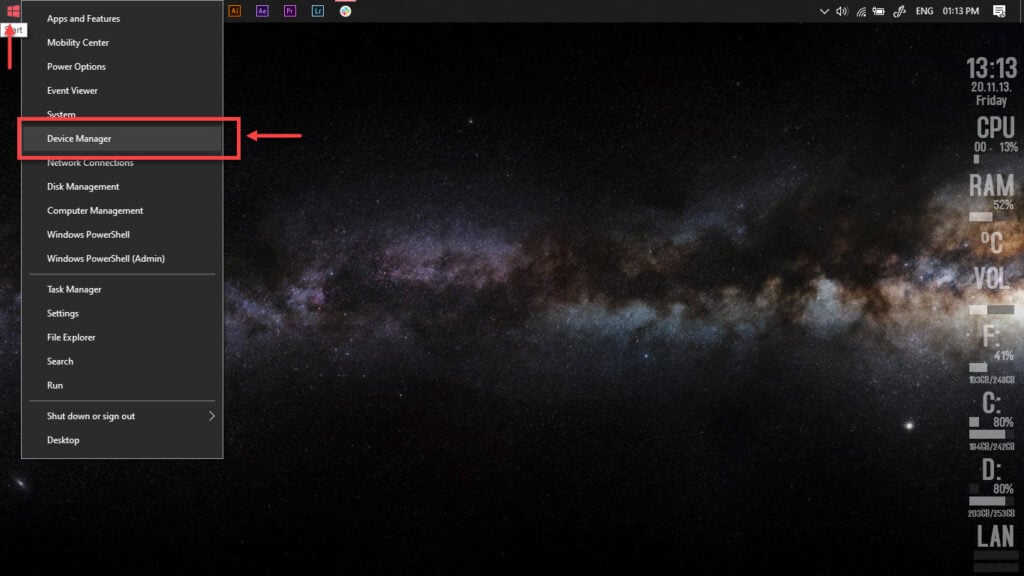
Step 1: Right-click Start and select Device Manager from the menu.

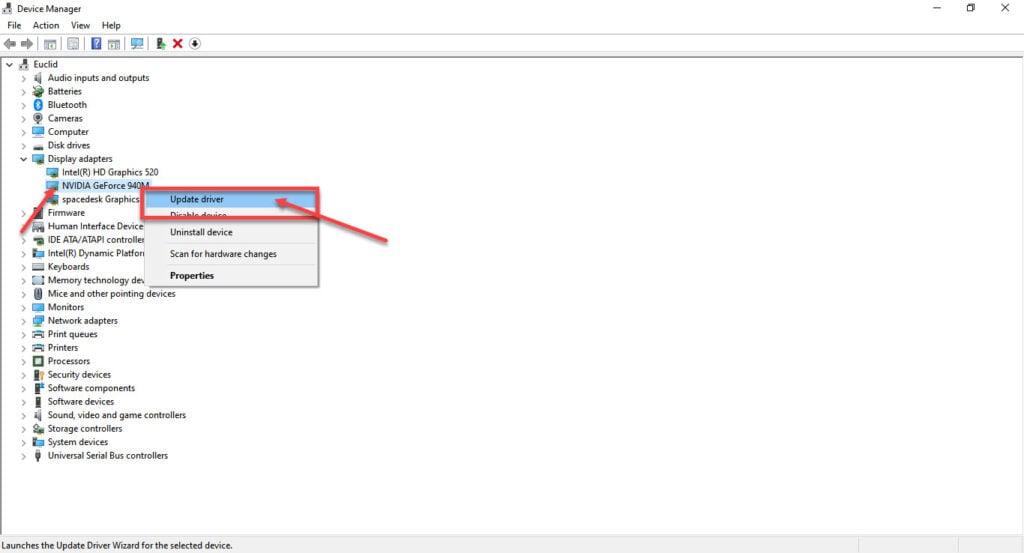
Step 2: Under Display Adaptors, find your graphics card’s name, right-click on it and click on Update Drivers.

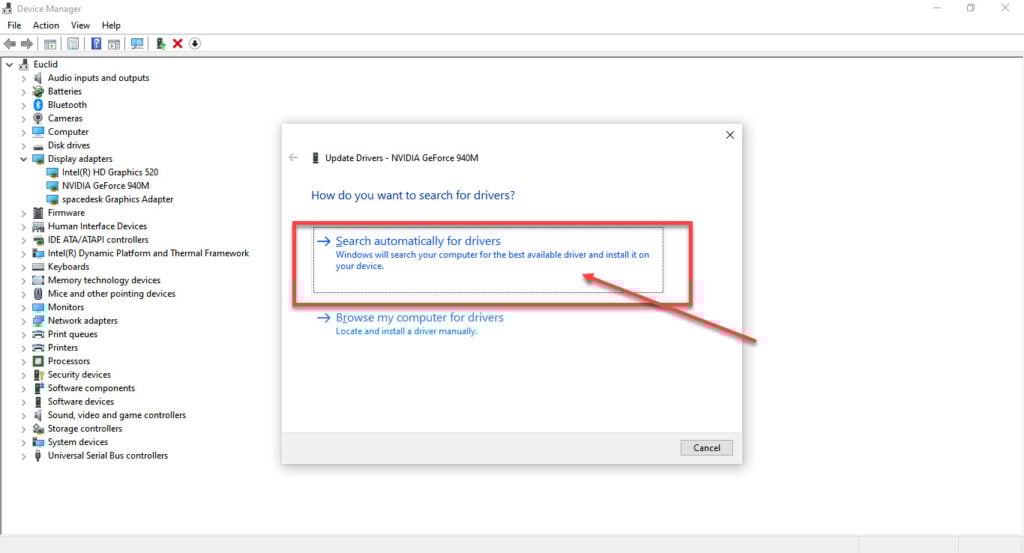
Step 3: Click on Search automatically for drivers. Windows will then automatically look for and download the latest drivers for your particular GPU.

In most cases, this will update your drivers just fine. However, if you’re looking for a fresh start, click Uninstall device and restart your PC to force Windows to install the required drivers. You can then update them later.
Using the GeForce Experience Utility
The GeForce Experience utility is Nvidia’s in-house tool that can help you stay on top of driver updates and help you manage and optimise your games according to your graphics card and other corresponding PC hardware.

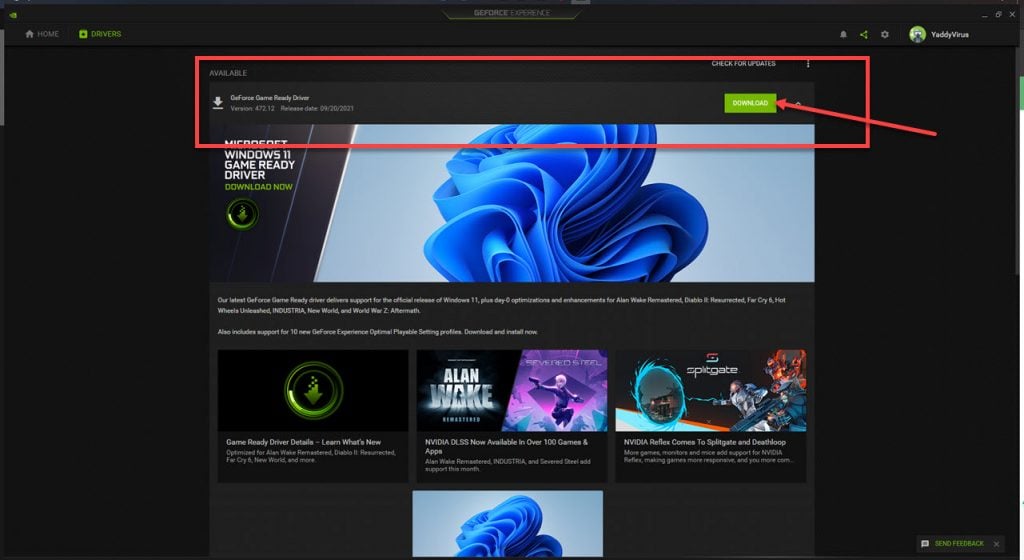
Updating drivers through the tool is also rather easy. Open the GeForce Experience tool and head over to the Drivers tab. If there’s an update available, it’ll show you an option to download the driver update right away and install it with minimal hassle required.
You can also use the Check for updates button to manually check for any updates that may be available.
Also read: Nvidia GeForce Experience error code 0x0001: 4 fixes


