Windows 11 is the latest and greatest in terms of operating systems from Microsoft and is constantly being updated to become its best possible version. However, this frantic update cycle can sometimes cause more trouble than benefit, as things tend to break when you update your system.
In this article, we’re talking about the “Ene.sys error” that occurs after a Windows update, its causes and what you can do to fix the problem.
What causes the Ene.sys error?
The error can actually be triggered by a number of problems including:
- Incomplete or corrupt update files
- Hardware or driver issues
- Missing or corrupt system files
Also read: Fix: DPC watchdog violation in Windows 11
How to fix the Ene.sys error?
Here are nine fixes you can try out.
Update your PC
The first thing you should do is to update your PC. Updating your PC will, in most cases, update your drivers and fix any issues.
Check out this detailed guide to know how to update your PC here
Disable Memory Integrity
Memory Integrity is used to protect your PC’s hardware from malware but in some cases it can be troublesome. Try disabling the feature to see if the error can be fixed.
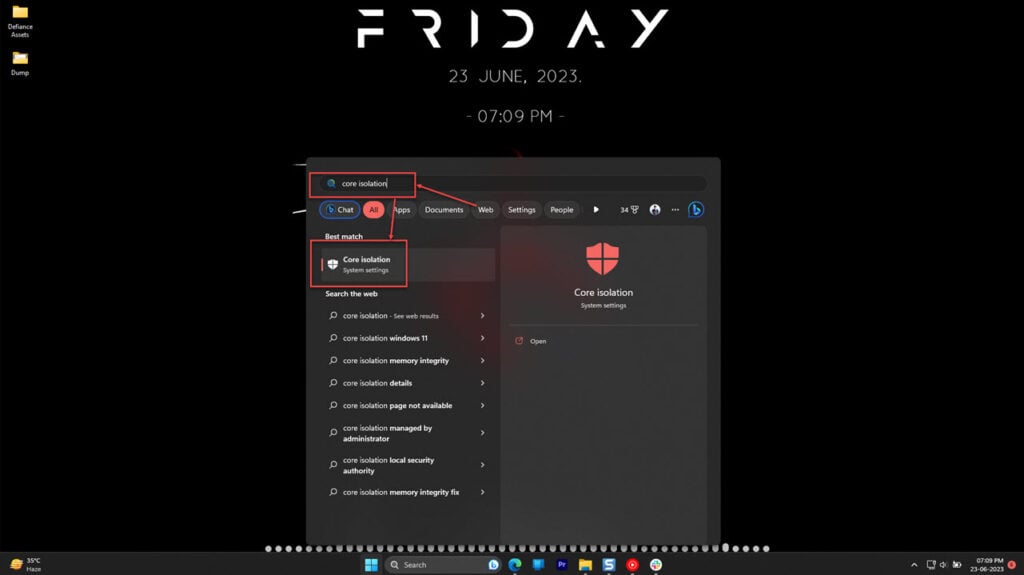
Step 1: Press the Windows key and search for Core Isolation.
Step 2: Disable the Memory Integrity slider.
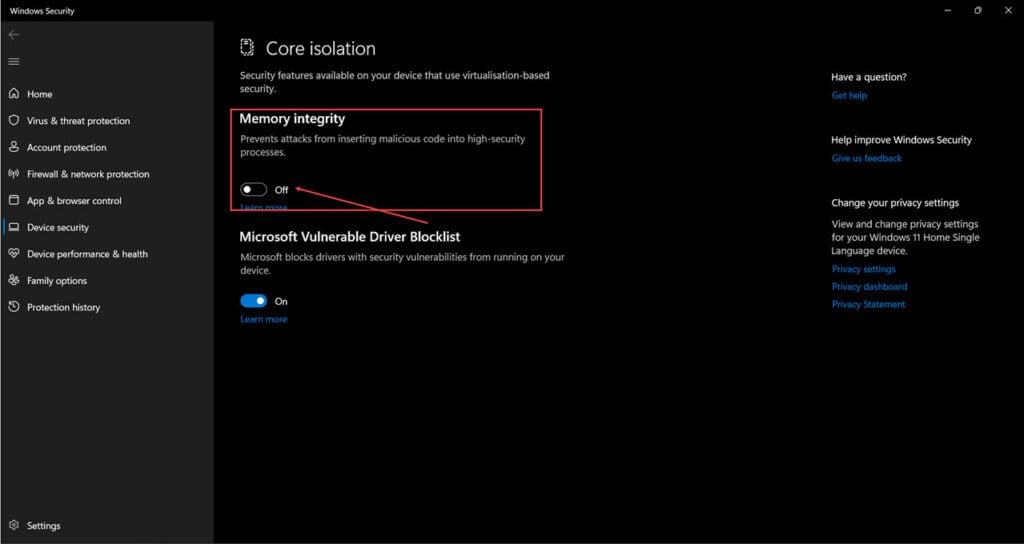
Restart your PC and try again.
Rename the ene.sys file
Renaming the ene.sys file will force the relevant programs to look for the file again and download it if necessary. This can resolve any errors with the file itself as a fresh copy will be downloaded off the server. You’ll find the file in the folder mentioned below
C:/Windows/System 32/drivers Run the Windows hardware troubleshooter
Windows comes with a few handy troubleshooters that can resolve many issues. However, for some reason, Microsoft has removed the hardware troubleshooter from the troubleshooter’s menu. So here’s an alternative way to run the hardware troubleshooter.
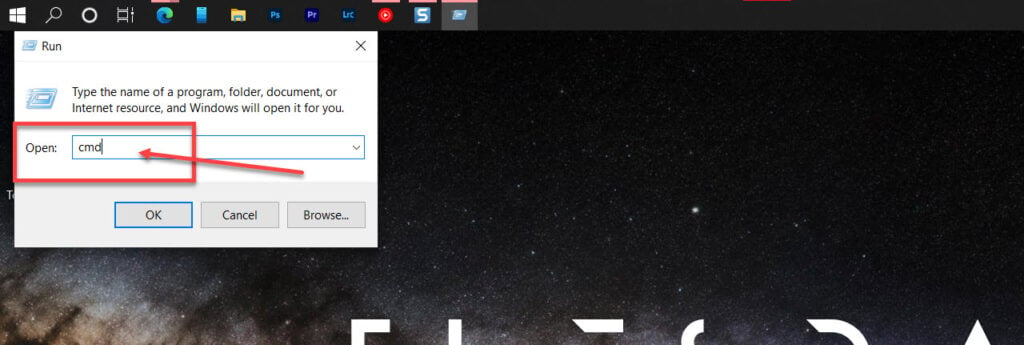
Step 1: Press the Windows key + R to open the Run prompt. Type cmd and hit enter.
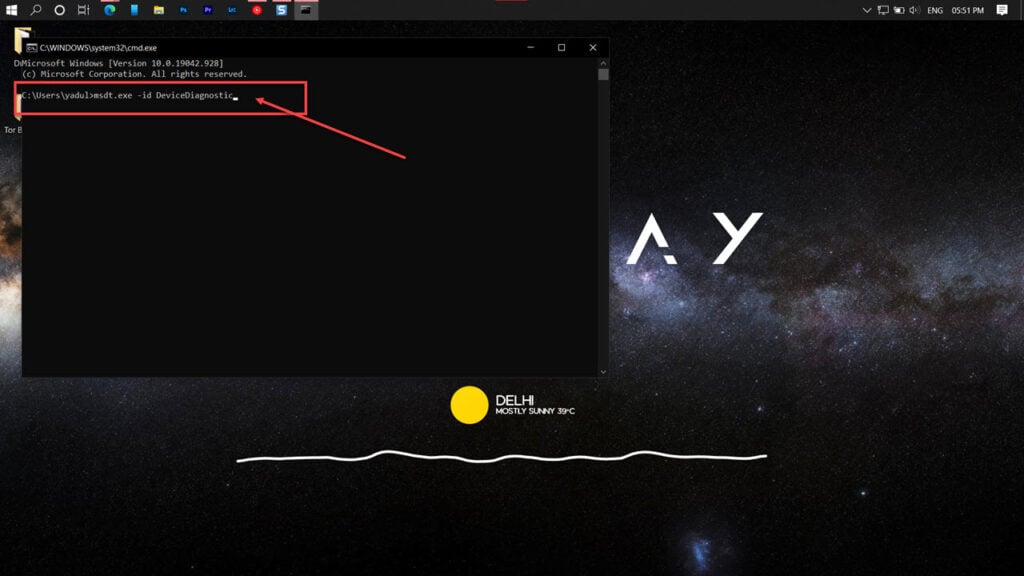
Step 2: Type msdt.exe -id DeviceDiagnostic and press enter. This will launch the hardware troubleshooter.
Proceed along as instructed by the troubleshooter.
Run the Windows 11 update troubleshooter
Just like Windows 10, Windows 11 also comes with a bunch of helpful troubleshooters that’ll automatically detect and resolve any problems your PC might be facing. The same goes for the update troubleshooter, here’s how.
Step 1: Press the Windows key and search for Troubleshoot settings. Click the corresponding search result.

Step 2: Click Other troubleshooters.

Step 3: Scroll to find the Update Troubleshooter and click the Run button.

This should automatically fix the problem.
Run an SFC scan
Corrupt files are the number one reason your PC might behave weirdly. Here’s how you can get rid of them and potentially resolve your issue.
Step 1: Press Windows Key + S to bring up the Cortana/Search box and search for Powershell. Open Windows Powershell from the search results.
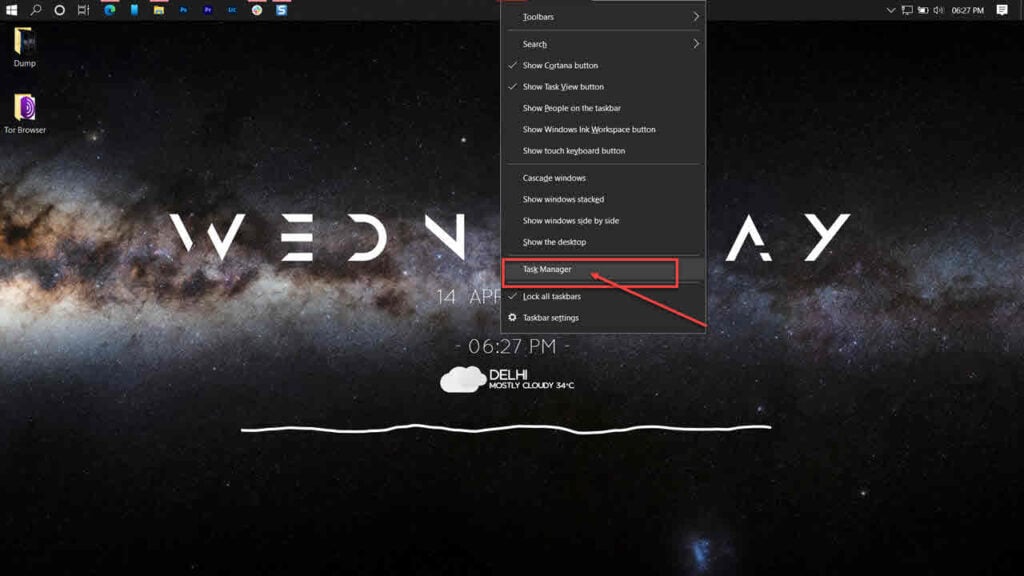
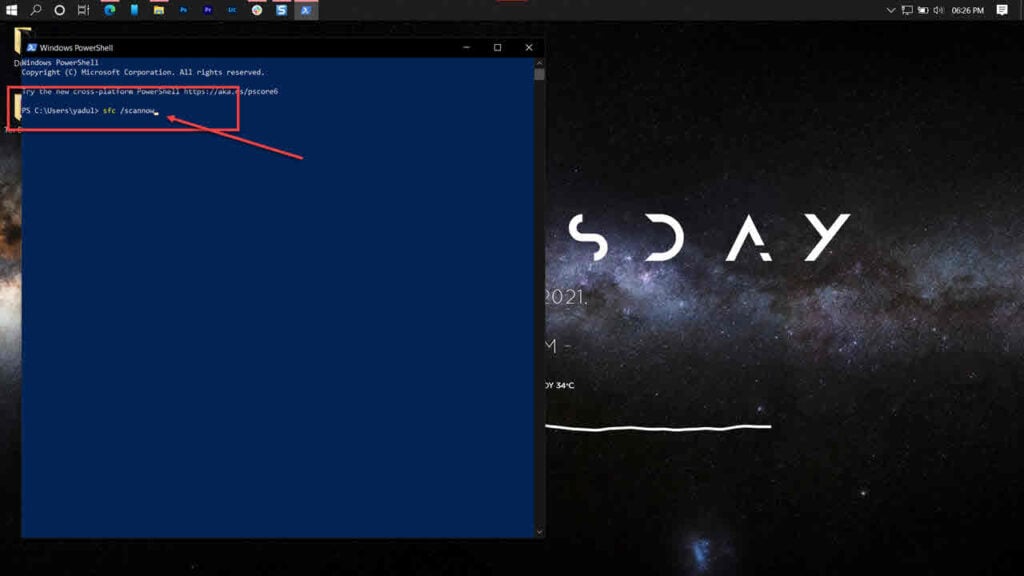
Step 2: Type sfc /scannow to scan your system for issues.
Step 3: If the SFC scan finds any problems, use the following command to resolve them.
DISM /Online /Cleanup-Image /RestoreHealth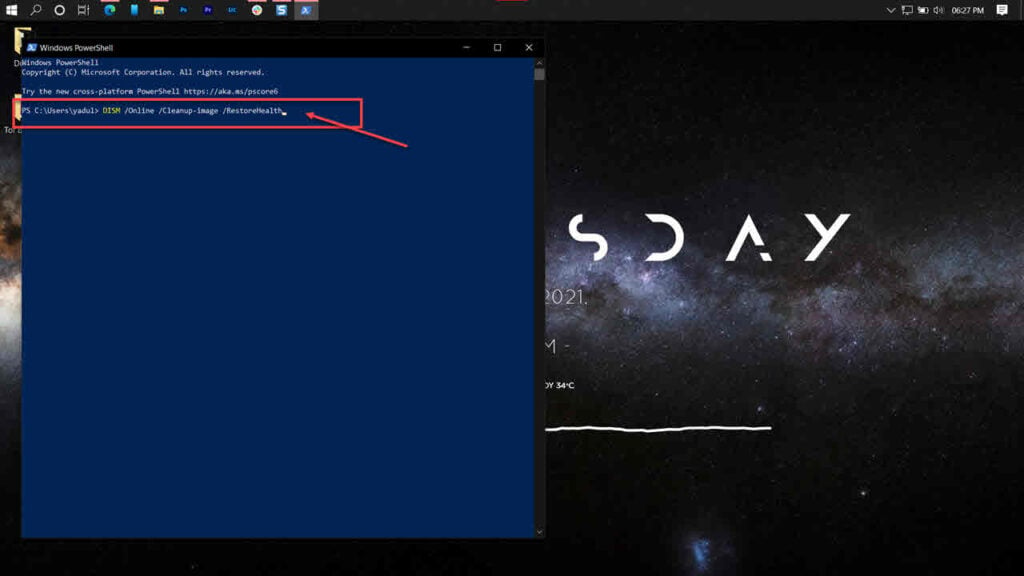
Restart your PC and the error should be gone.
Update your drivers
Updating (or uninstalling) the problematic driver can also fix the problem.
Step 1: Right-click Start and select Device Manager from the menu.
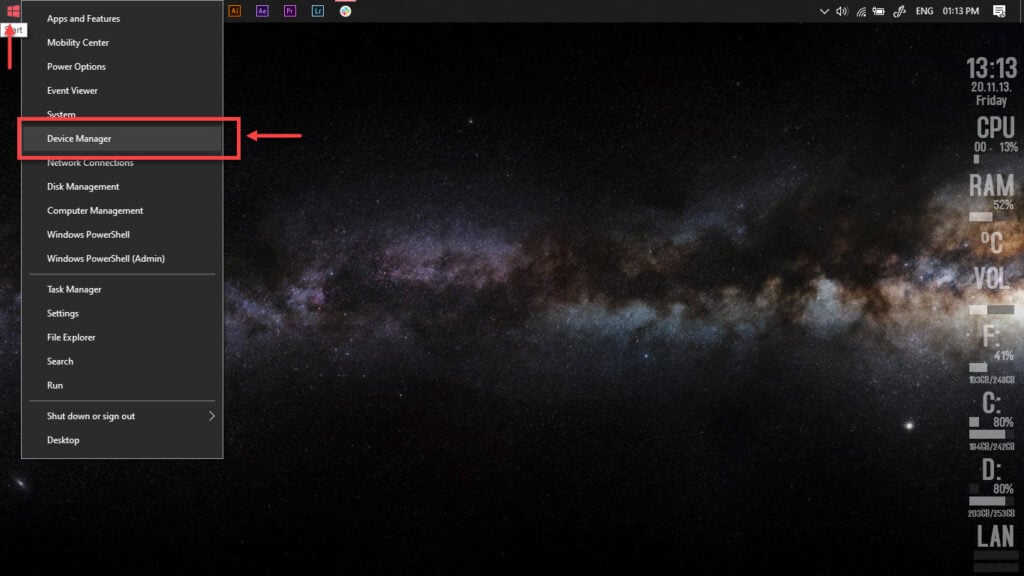
Step 2: Expand the problematic driver, right-click on it and click Update driver.
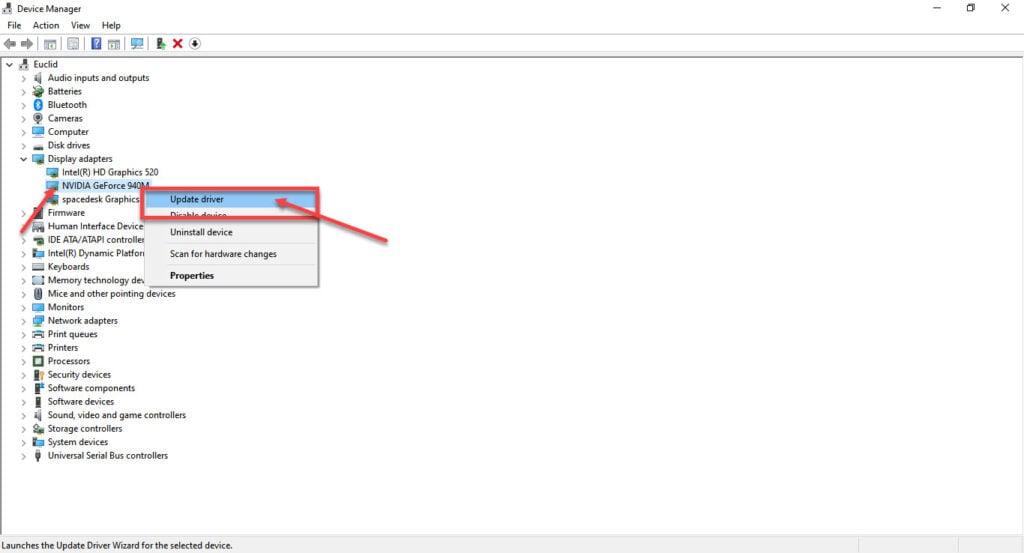
Step 3: Click on Search automatically for drivers. Windows will then automatically look for and download the latest drivers.
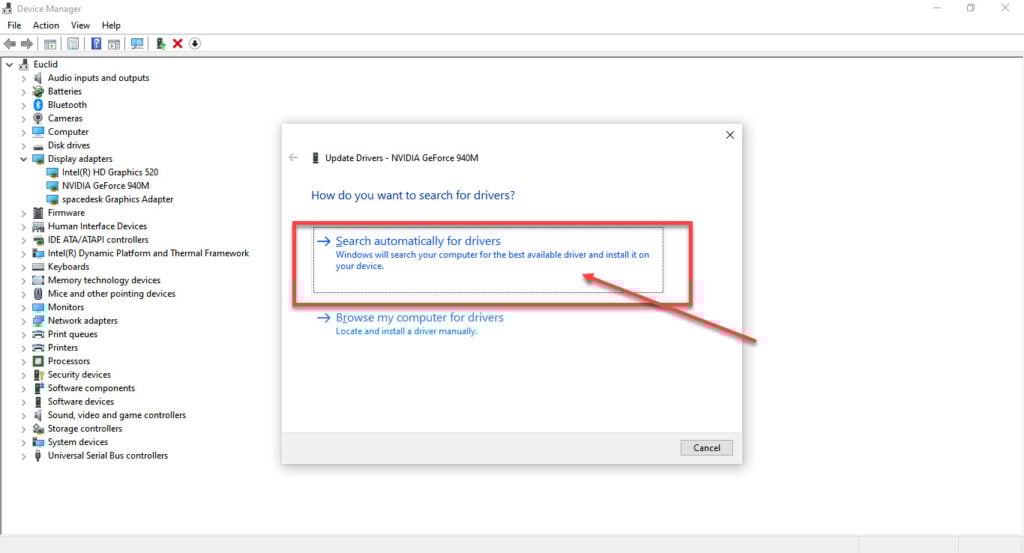
While this should help resolve the error, if it doesn’t, click Uninstall device and restart your PC to force Windows to install the required drivers. You can then update them later.
Reset Windows Update modules
Another thing you can try is completely resetting Windows Update modules to get them to work properly.
Step 1: Press Windows Key + X to open the Quick Access menu and click on Command Prompt (Admin).
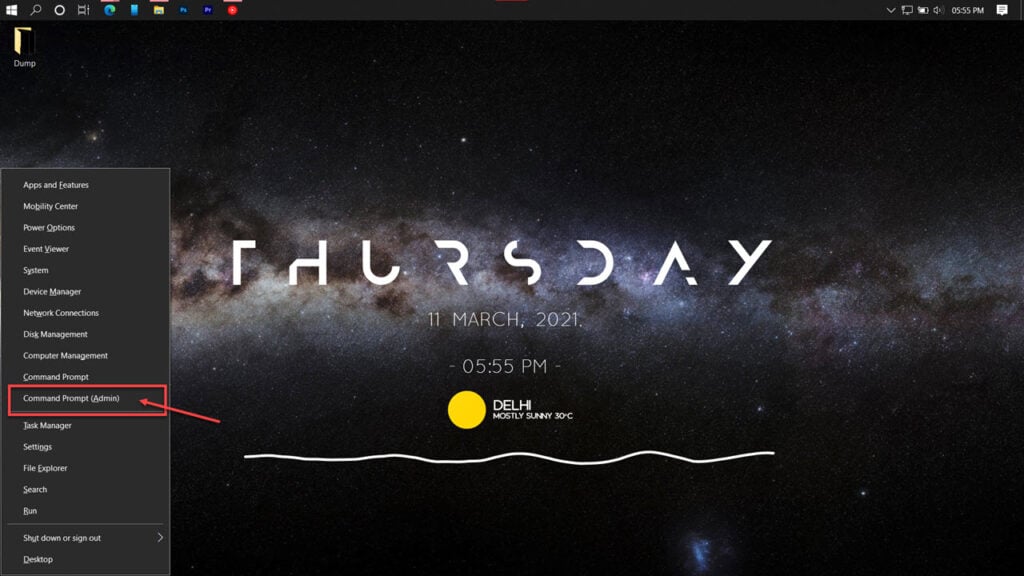
Step 2: Type the following command in the prompt and press Enter.
net stop wuauserv

cd %systemroot%

ren SoftwareDistribution SoftwareDistribution.old

net start wuauserv

net stop bits

net start bits

net stop cryptsvc

cd %systemroot%\system32

ren catroot2 catroot2.old

net start cryptsvc

regsvr32 Softpub.dll /s

regsvr32 Wintrust.dll /s

regsvr32 Initpki.dll /s

regsvr32 Mssip32.dll /s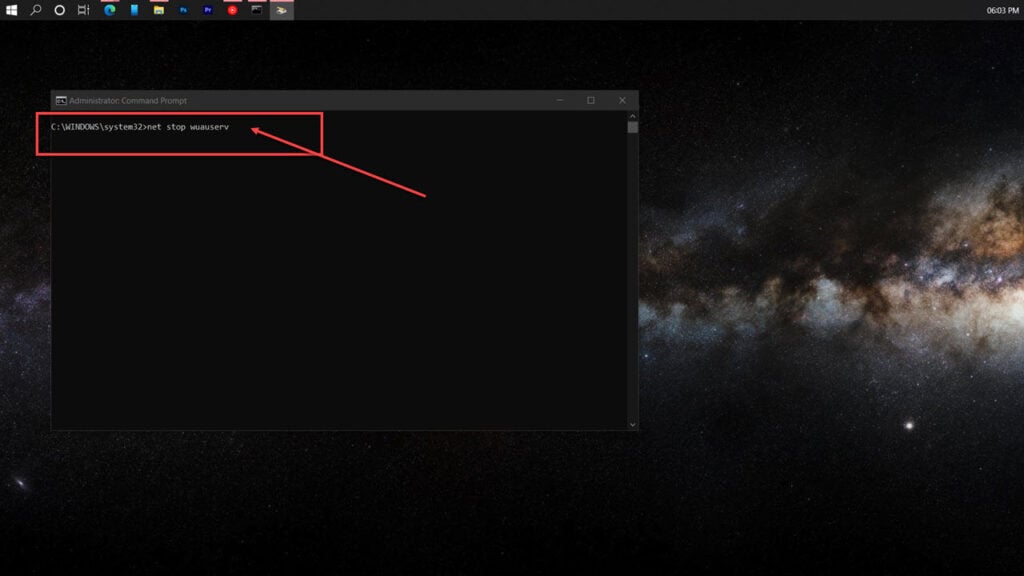
Now try looking for the update again to see if installing it fixes the problem.
Repair your system
If nothing else works, the best way to eliminate the error is by reinstalling or repairing your OS.
The Windows Media Creation tool is a great way to install Windows and repair the OS. Using this, you can perform a clean installation or repair your OS without affecting your data.
You can download the Media Creation Tool here
Also read: Fix: Driver power state failure Windows 11


