Although there is a difference between a file type and file extension, the two terms are now used interchangeably. Multiple file extensions can be used for a file type. For example, PNG and JPG file types can be used for similar files. However, you cannot change the extensions if the file type is different. For example, you cannot convert a .docs file to .mp3.
The file type of any given file can be gauged from the words written after the dot. The extensions are small — only about three or four letters. These extensions explain the data stored in the file and will also give you an idea of which programs can open it.
Examples of file extensions include .docx, .xls, .ppt, .png, .mp4, and .jpg, among many others. .docx is a Word file, and .xls is an Excel file. This means you need Word, Excel or some related program on your device to open these files. Otherwise, you wouldn’t be able to access the file.
However, sometimes, you may need to change the file type due to compatibility issues or software difficulties. It is not as simple as changing the letters after the dot.
In this article, we’ll explain four ways to change the file type in Windows 11.
Using File Explorer
This is the easiest way to change the file type in Windows 11 or 10. Open File Explorer by pressing the Windows key + E and then follow the instructions given below:
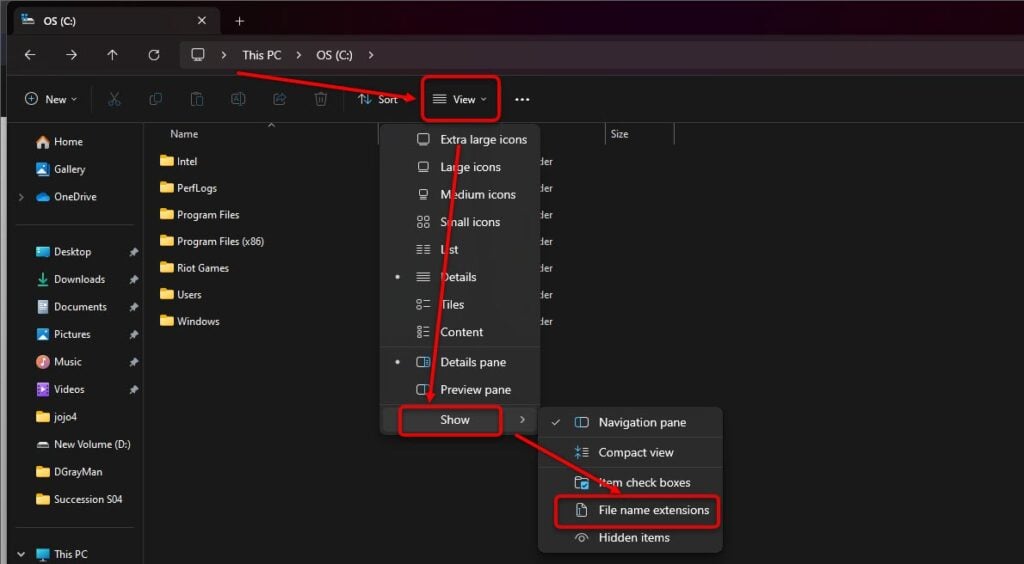
Step 1: Head to View > Show > File name extensions.
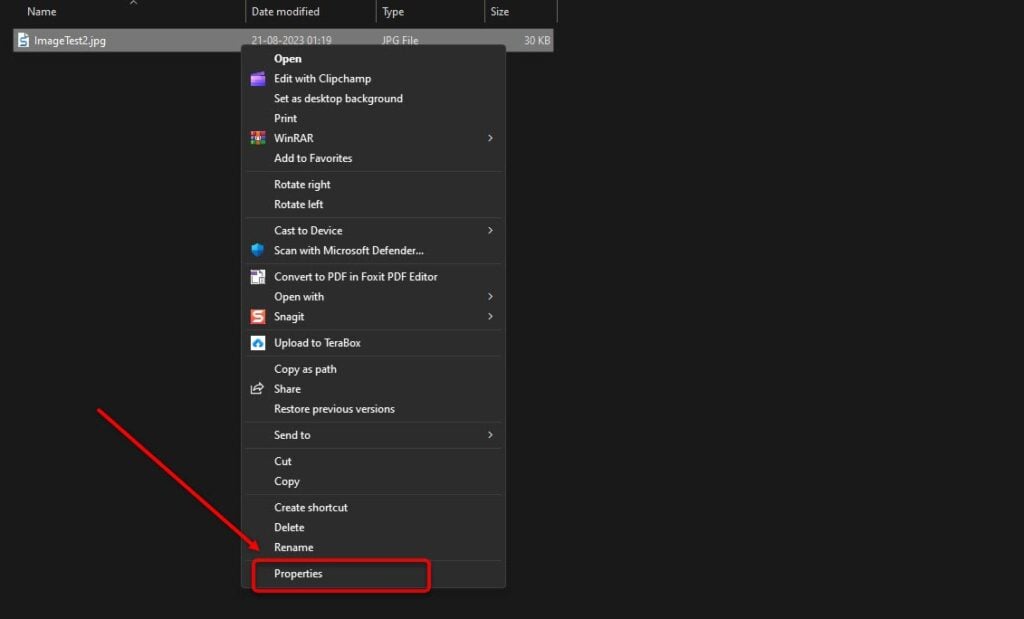
Step 2: Next, right-click on the file and then select Properties.
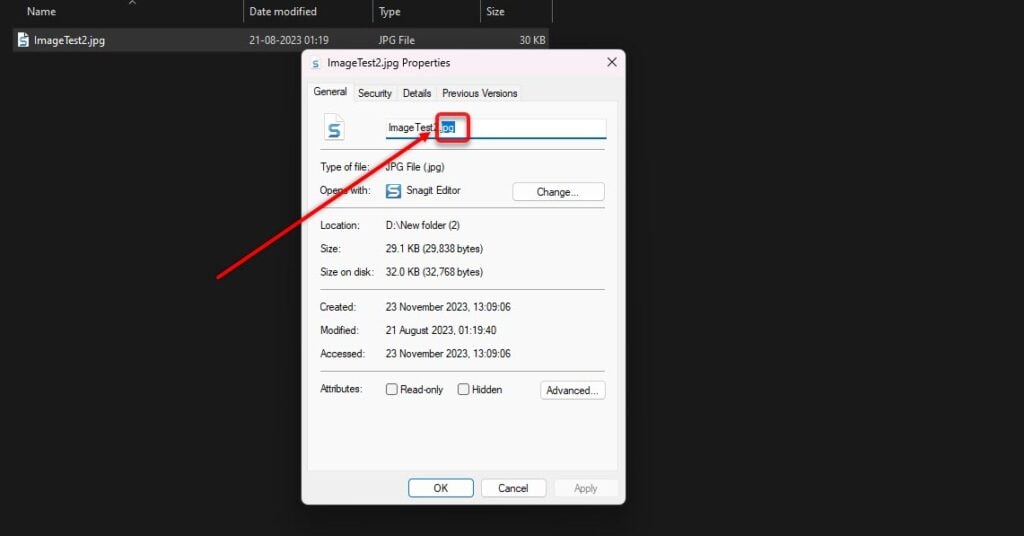
Step 3: Change the letters after the dot in the General tab. For example, in the screenshot given below, you can change .jpg to .png.
Usually, this method works for most file types. But you’ll have to remember to change the file extension related to the file type. For example, you cannot change .jpg to .xls and expect the file to work fine.
Also read: How to turn off background apps in Windows 11?
Using Save As option
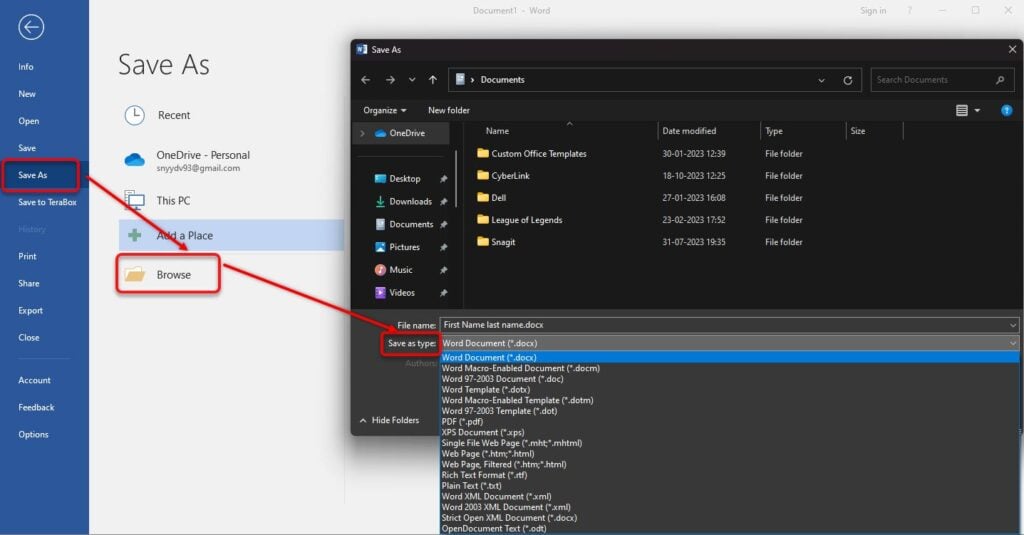
Another quick way to change the file type in Windows 11 is via the Save As option. You can find this option in many applications, including Word, Excel, PowerPoint, and photo editing software like Snagit.
This option allows you to change the file extension when setting the location.
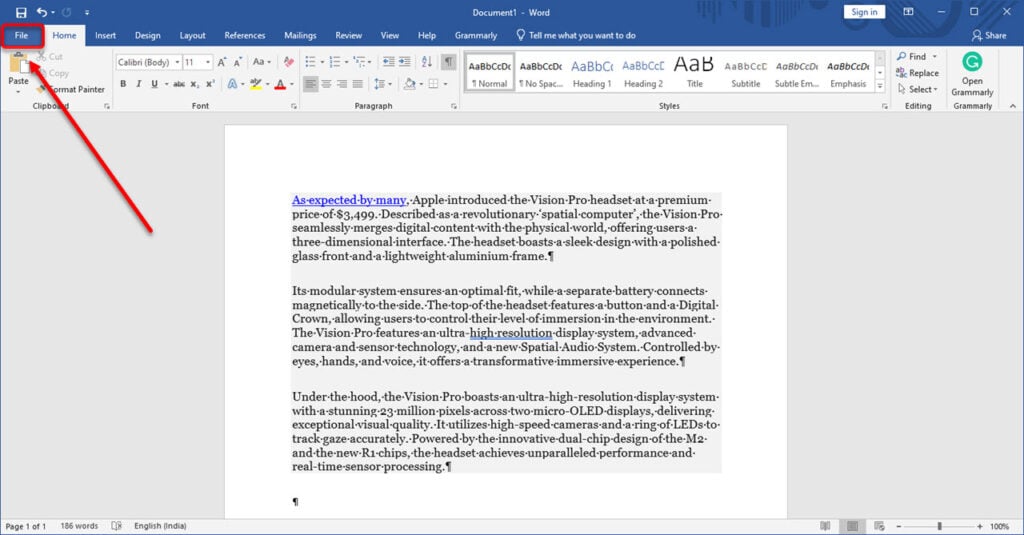
Step 1: All you need is to access the Save As option. In most applications, you’ll find it in the File option.
Step 2: Next, select Save As and then set the location. Just click on the downward arrow beside Save as Type option to select other file extensions.
Also read: Where are fonts stored in Windows 11?
Change file type in Windows 11 using Command Prompt
For those interested in basic command sequences, you can change the file type in Windows 11 via Command Prompt, too.
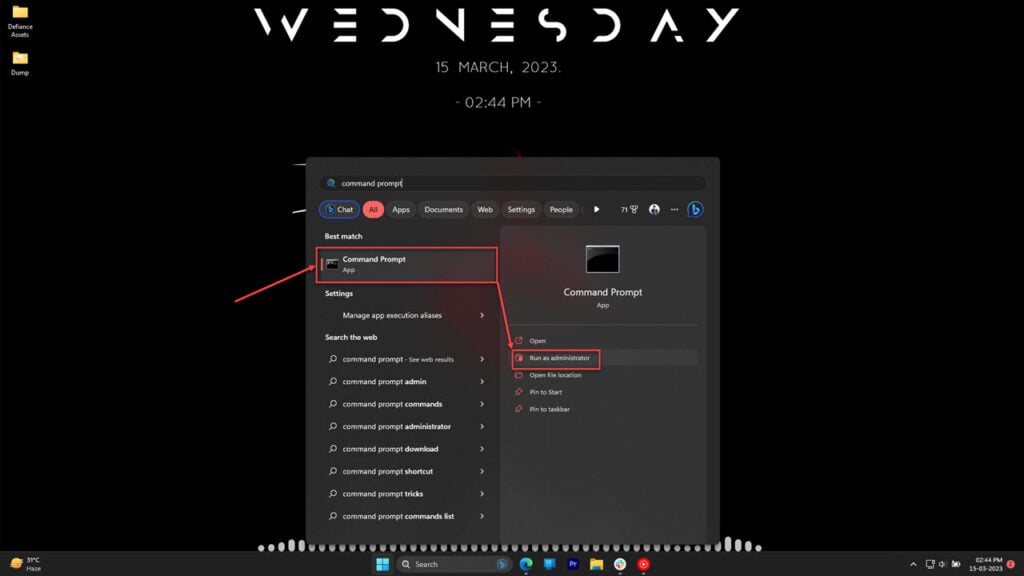
Step 1: Open the Command Prompt by typing cmd or command prompt in the search bar and then selecting the result.
Step 2: Now, set the directory path to the location of the file.

After that, enter the following command: ren [file_name].[extension1] [file_name] [extension2].
Where [file_name] is the file’s name and [extension1] is the current extension. On the other hand, [extension2] is the new extension that you want. You can also change the file name here, but that’s not the scope of the article.
For example, if you want to change the file extension of Image1.png to Image1.jpg, here’s how you will give the command: ren Image1.png Image1.jpg
It looks a bit scary, but it’s fine. You have to enter the file location and give this command. After that, press Enter to finalise the changes.
Also read: How to make the taskbar smaller in Windows 11?
Third-party tools
Finally, you can change the file type in Windows 11 via several third-party tools available on the internet.
Websites like Zamzar offer these services for free, while others charge a minimal amount. However, remain vigilant as such websites are also sources of malware that can harm your device.
Also read: How to check mouse DPI in Windows 11?


