Most modern devices like mobile phones, tablets and laptops can automatically pick up time zones and adjust their displayed time based on the device’s location. This applies to the Windows 11 OS as well.
But if you find that your device is displaying the incorrect time or cannot auto-update, especially after travelling to a different time zone, here are 2 ways to change the time zone on Windows 11.
Change the time zone via Settings
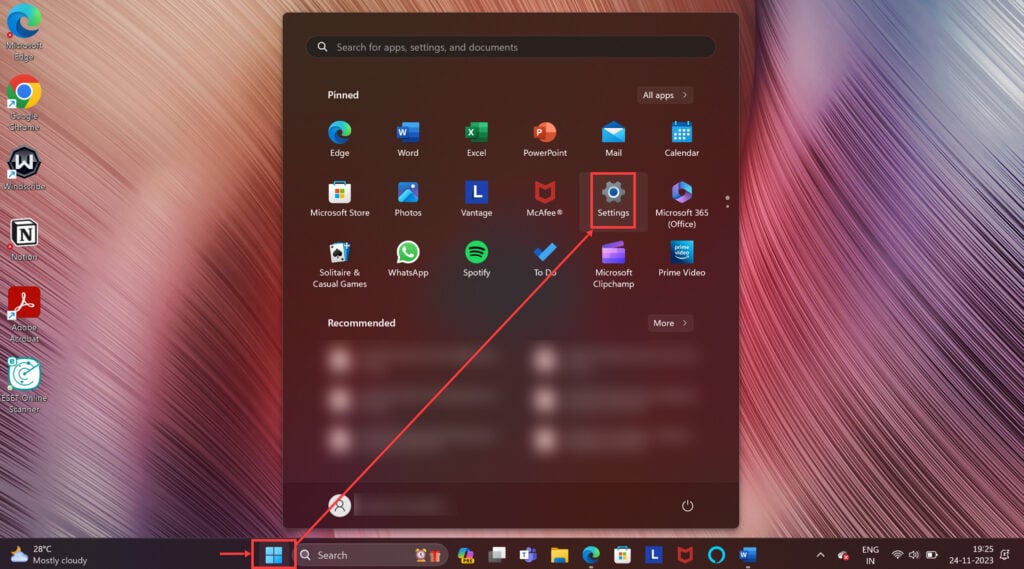
Step 1: Open Settings – Click on the Windows key and press the I key (Win+I) or the Windows icon in the taskbar at the bottom of your screen, and then tap the gear icon to open Settings.

Step 2: Open Date & time – On the left panel, choose Time & language. Then, tap the Date & time option.

Step 3: Set the time automatically – If you want the system to pick up the time on its own, toggle the Set time automatically to On.

- Manually select the time zone – You can choose your time zone by tapping the drop-down arrow next to the Time zone and selecting the relevant Coordinated Universal Time (UTC). E.g. for India, you can choose UTC+5:30, and for London, UTC+00:00.
- Set the time zone automatically – Appearing as the first option on the Date & time tab, toggle Set time zone automatically to On. If the time zone does not change or is displayed incorrectly, click on Sync now under the Additional settings section. If your location settings are turned off, this option will appear greyed out for you. You will have to provide location permissions to access this option.
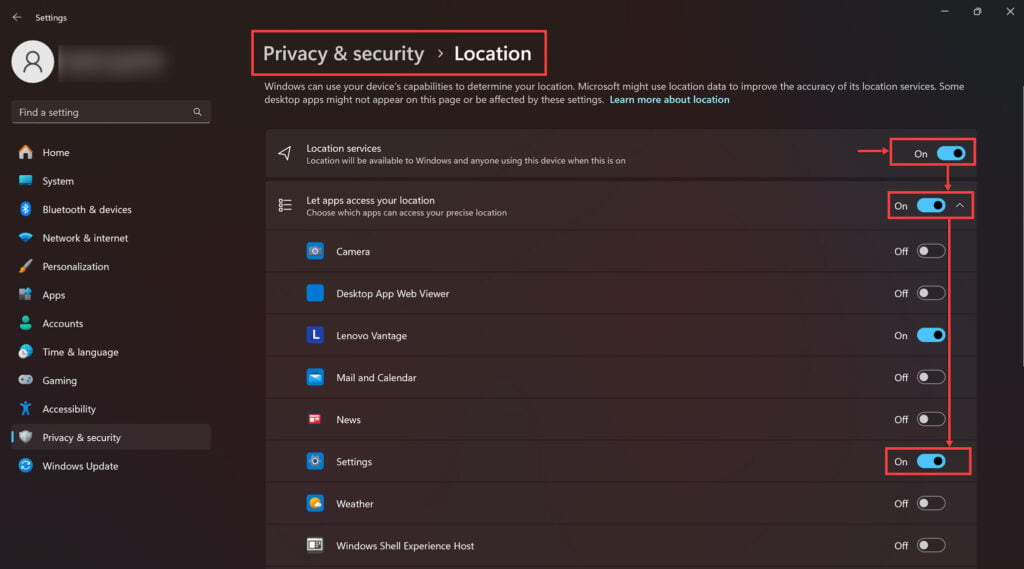
- Enable location – To enable the option to set your time zone automatically, tap Location Settings right above the option. Toggle Location services to On. Enable Let apps access your location. Then, allow access to the Settings app.

Alternatively, open Settings and go to Privacy & security. Scroll down and click on Location. Toggle Location services to On. In the same tab, toggle the button next to Settings to On.

Head back to the Date & time tab, and you can now enable the Set time zone automatically option.

Once you enable set time zone automatically, the option to manually choose your time zone will not show until you disable its automatic selection.
Also read: How to remove the PIN from Windows 11?
Change the time zone using the Control Panel
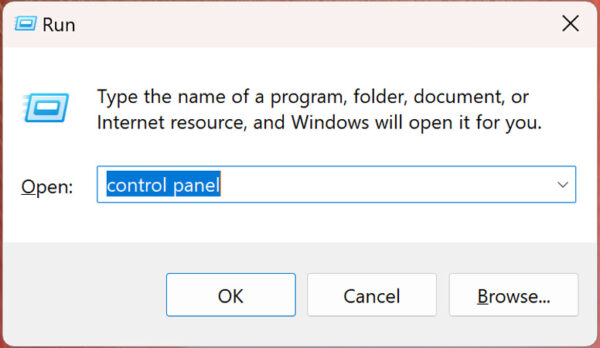
Step 1: Open the Control Panel – Type control panel in the taskbar at the bottom of the screen. Click on Control Panel. Or you can open it using the Run menu. To do so, type Win+R. In the Run menu that appears, type control panel and click on OK. This will open the Control Panel.

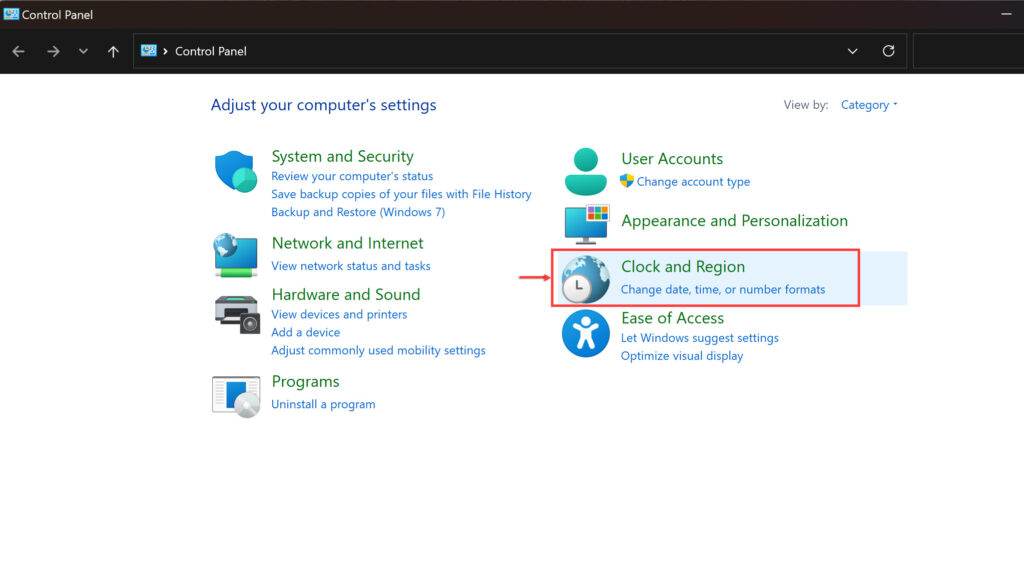
Step 2: Open clock – In the Control Panel, click on Clock and Region.

Step 3: Access time – Tap the Date and Time option.

Step 4: Change time – You can explore many options from here. You can manually change the time by clicking on Change date and time. Or you can change the time zone to reflect the time based on your chosen time zone.

Step 5: Add different time zones – If you click on Additional Clocks, you can add more than one clock to your device. You can see both once you add 2 clocks when you click on the displayed time on the right corner of your screen.

Also read: How to change file type in Windows 11?


