Networking in Windows has gotten progressively easier as newer Windows versions expose these features in a better way to the general audience. Network discovery is an important part of Windows as it allows Windows PCs to share files with each other over a network.
In this article, we’re looking at how you can enable network discovery in Windows 11.
Also read: USB power management in Windows 11 explained
Enabling network discovery in Windows 11
Enabling network discovery in Windows 11 is rather easy. There are, however, two methods of doing this.
- Using Windows Settings.
- Using the Control Panel.
We’ll be going over both these methods.
Using Windows Settings
Instead of manually enabling the setting, network discovery is now automatically enabled on all private networks. Here’s how you can change a network type in Windows 11.
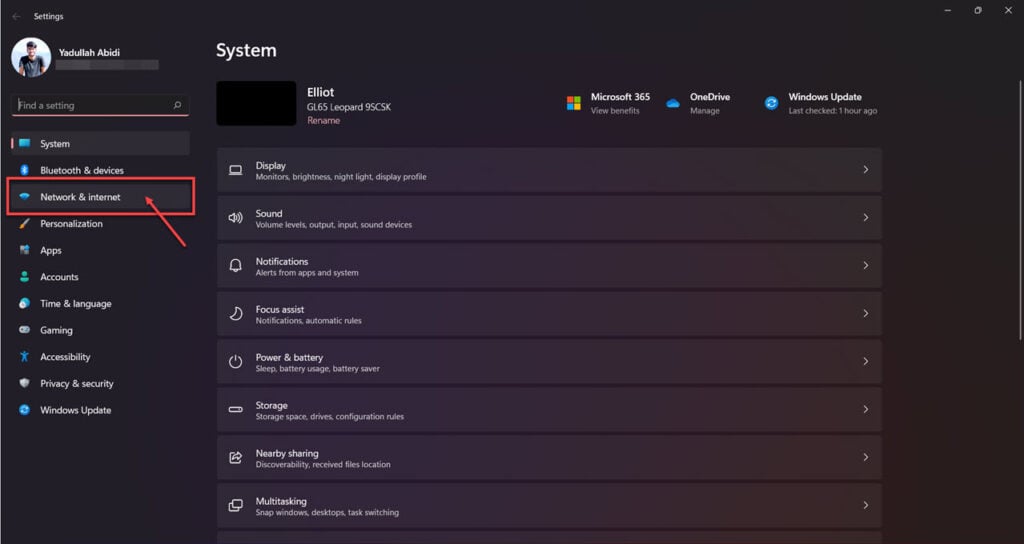
Step 1: Press Windows key + I to open Windows settings. Head over to the Network & internet tab.

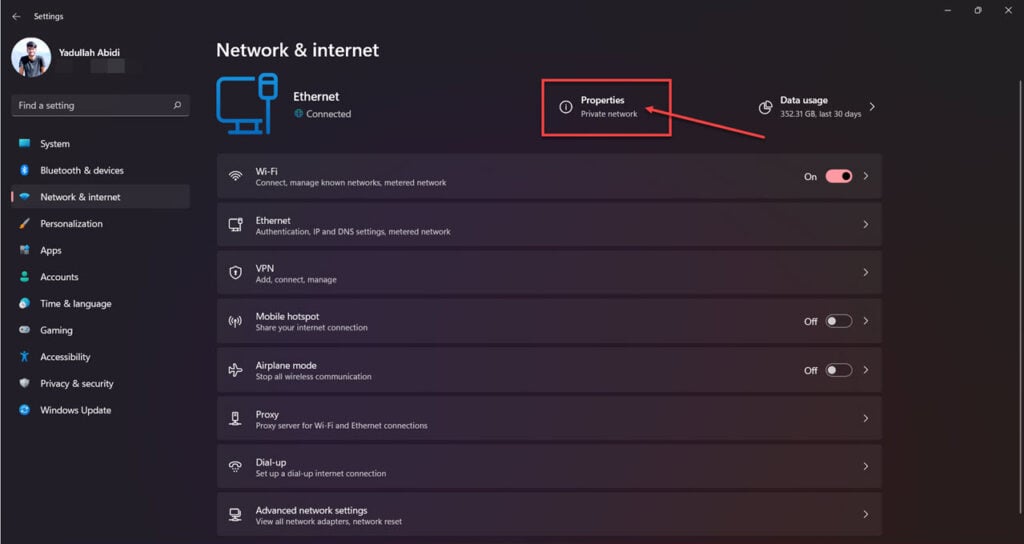
Step 2: Click the Properties tab next to your active internet connection.

Step 3: Under Network profile type, select Private.

Doing so will automatically enable network discovery for the active network. Keep in mind that you’ll have to do this for every network specifically.
Also read: WD Elements vs My Passport: 4 key differences
Using the Control Panel
Alternatively, if this doesn’t enable network discovery, you can always do it the old-fashioned way using the control panel.
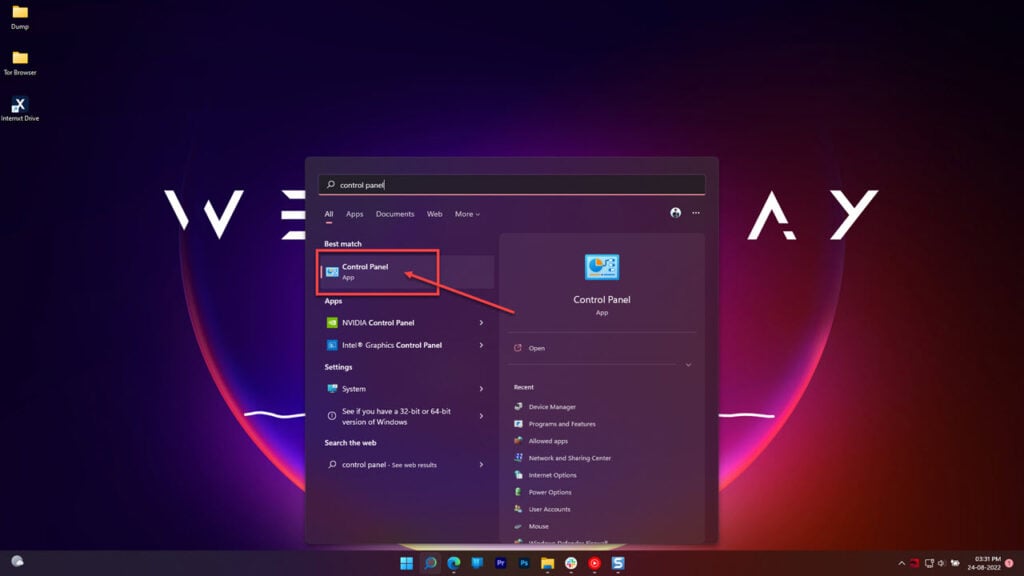
Step 1: Press the Windows key and search for Control Panel. Click the corresponding search result.

Step 2: Click the Network and Sharing Center.

Step 3: Click Change advanced sharing settings in the left side panel.

Step 4: Here you can toggle network discovery as well as file and printer sharing settings for each network profile individually.

Keep in mind though that the changes you make here apply to all networks in a given profile so be careful to not accidentally enable network discovery on public or unknown networks.
Also read: ISO files in Windows 11: Everything you need to know


