The phone devices in our hand have become the primary camera in our lives. iPhone comes with a powerful camera which makes it even more satisfying to click pictures and hone our photography skills.
With more and more photos stored on your iPhone, you might need to transfer some of it to make space in your phone or perhaps, you want to edit pictures using your Macbook software. Whatever might be the reason, there are many options to import or transfer photos from iPhone to Macbook.
In this article, we have listed three main ways to import pictures from your iPhone to your Macbook using a USB cable, wirelessly through iCloud photo stream and AirDrop, if you have recent versions of Macbook.
Also read: How to set up Dual SIM on iPhone?
How to import photos using a USB cable?
Connect your iPhone to your Macbook using a USB cable. If it prompts, unlock your iPhone via the passcode and follow the steps mentioned below.
Step 1: Open the Photos app on your Mac via applications, if the app doesn’t open automatically as soon as you connect your iPhone via a USB cable.
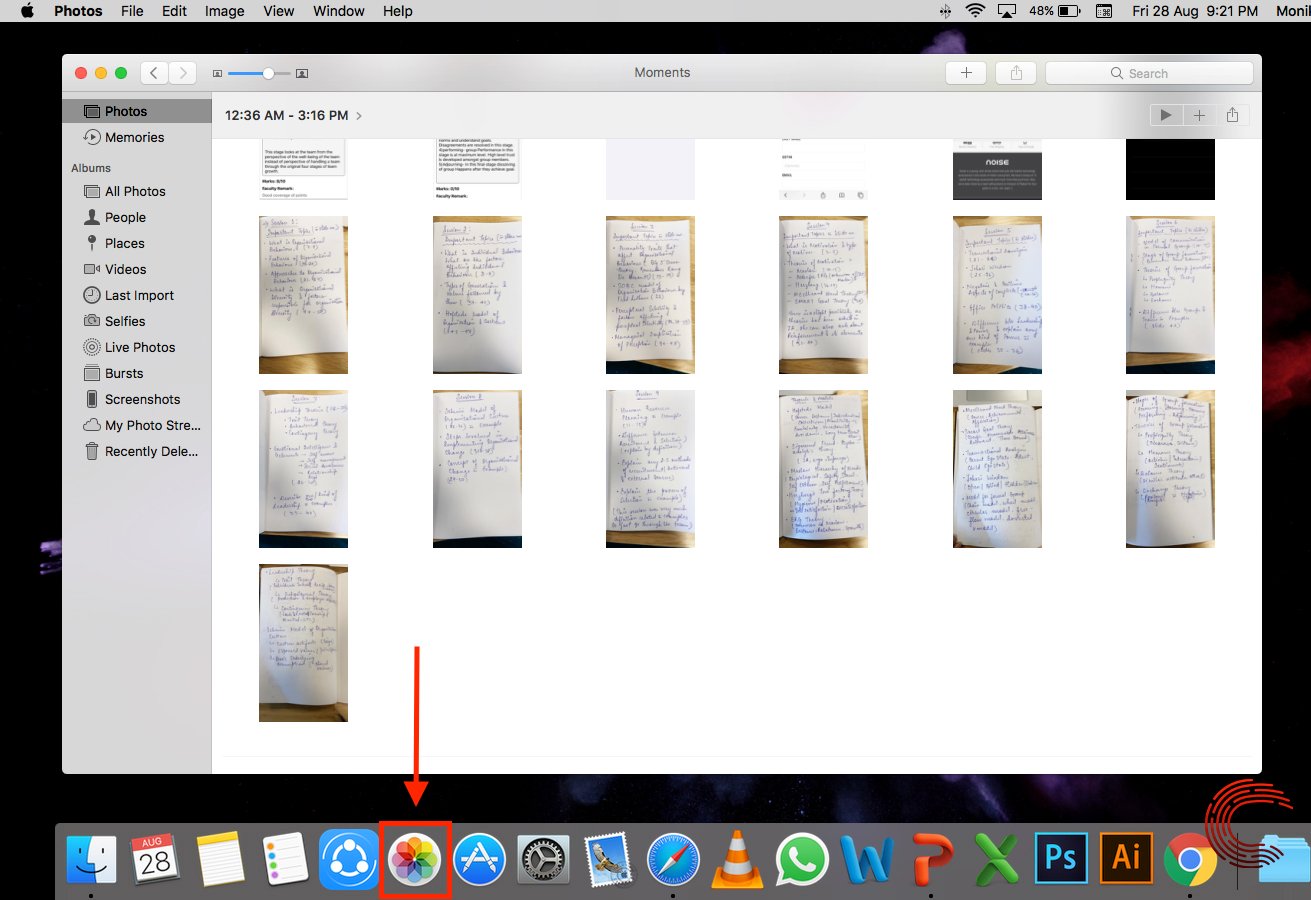
Step 2: The photos app will automatically open the Import screen listing all the photos and videos that are stored in your iPhone.

If it doesn’t automatically appear, there are two ways to get it: Click on your device name on the left sidebar or click on File from the taskbar and select Import from the drop-down menu.
Step 3: Select photos by holding the Command key on Mac’s keyboard and click on all the images that you want to download. Then click on the Import Selected button in the top-right corner of the screen.

Step 4: If you have imported some of your photos from your iOS device earlier, then your Macbook will identify that, and will give you an option to import the remaining photos by clicking on Import All New Items.

Step 5: Wait for the process to finish then disconnect the iPhone from your Mac. To view imported photos, select Last Import on your sidebar.

Also read: How to AirDrop from Mac to iPhone?
How to import photos using iCloud Photo Stream?
Photostream does not use any of your iCloud space, but the photos saved here auto-delete after 30 days. The tool also doesn’t work for videos. To set up photostream, you will have to enable it on your iPhone and Macbook.
How to enable Photo Stream on iPhone?
Open the Settings app on your iPhone and follow the steps below.
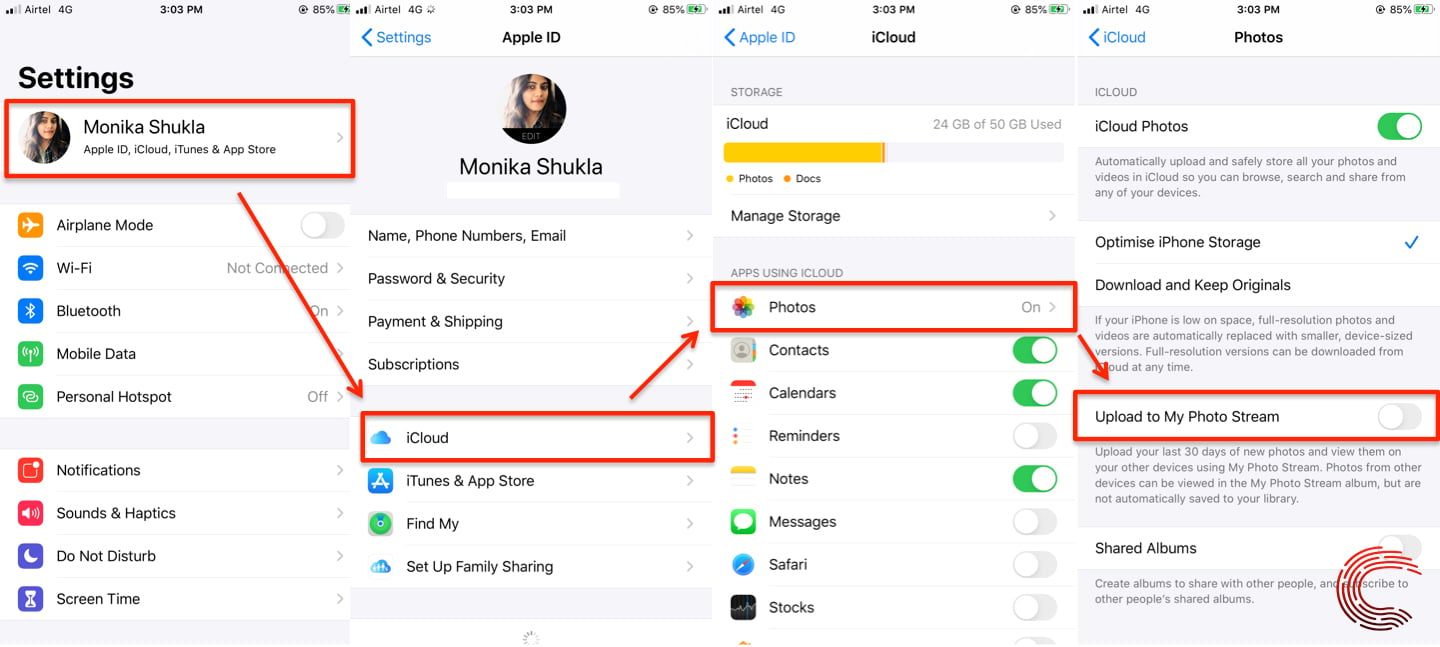
- Tap on your name, which is your Apple ID at the top of the page.
- Select iCloud on the next page.
- Then tap on Photos.
- Then tap on the toggle button beside Upload to my Photo Stream to enable the feature.
Also read: How to delete photos on your MacBook?
How to enable Photo Stream on MacBook?
Step 1: Click on the small Apple icon on the top-left corner of the screen.

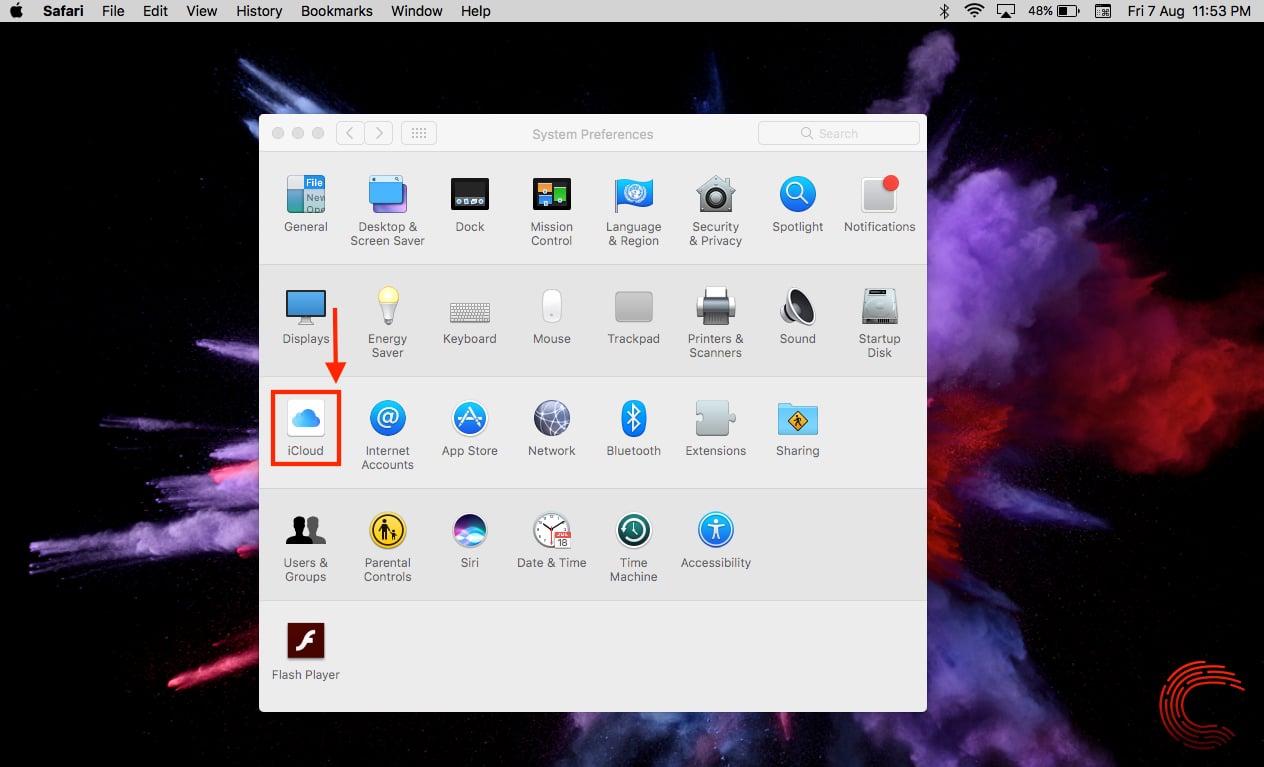
Step 2: Select System Preferences from the dropdown list of options.

Step 3: Click on iCloud and sign in.
Step 4: Click on the Options button next to Photos.

Step 5: Check the box next to My Photo Stream and click on the Done button.

Your photos will be automatically updated in your Photo Stream whenever you have an active WiFi connection. However, only 1000 photos can be updated at once, which will be automatically deleted after 30 days.
Alternatively, you can make changes in the Settings so that images automatically download in your Macbook’s photo library.
Also read: Top 7 budget apps for iOS
How to set up automatic download of Photo Stream images on MacBook?
Open Photos app on your Macbook and follow the step mentioned below.
Step 1: Click on Photos, located on the taskbar.

Step 2: Select Preferences from the dropdown list.

Step 3: Under the General tab, click on the checkbox beside Copy Items to the Photo Library box.

Also read: How to buy storage on iPhone?
How to import photos using AirDrop?
Step 1: Go to Photos app on your iPhone and follow the guide in the bullet points below..
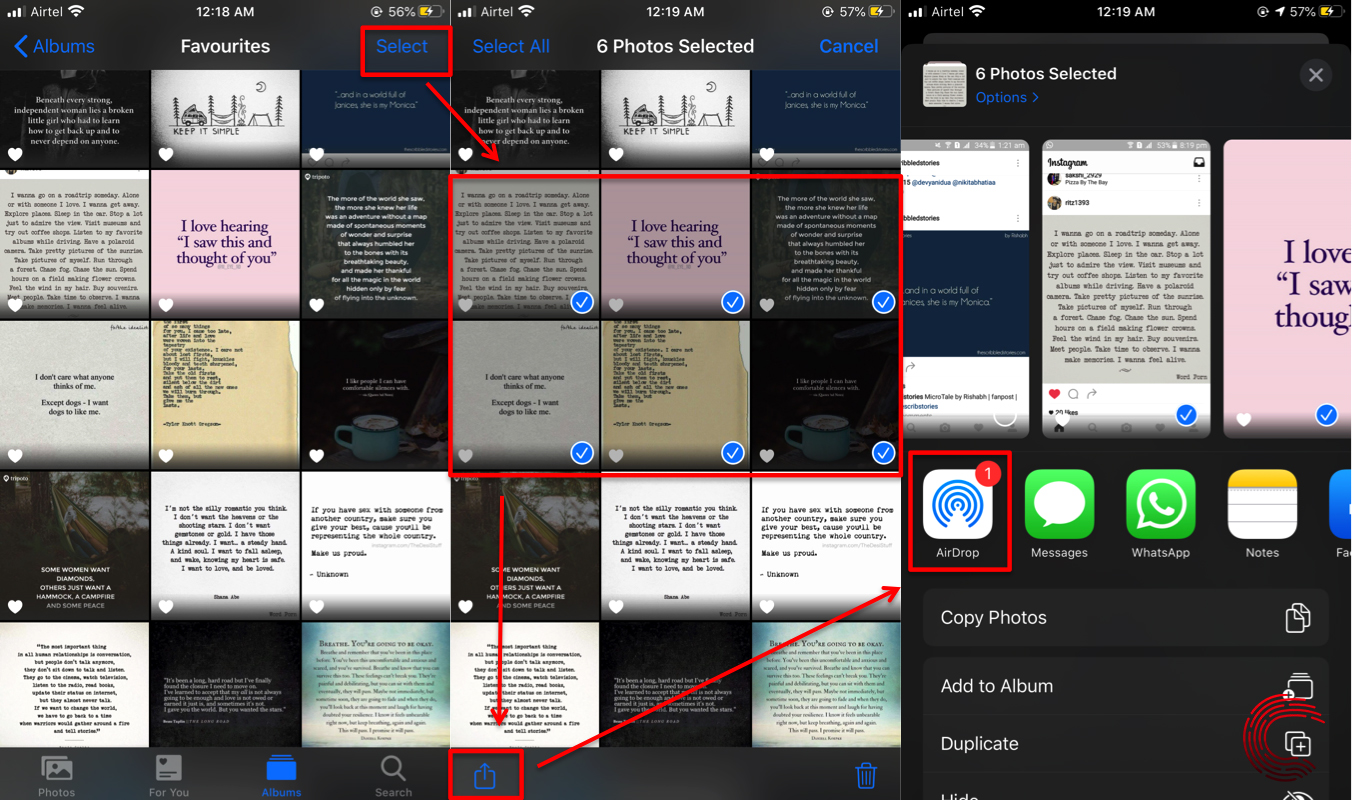
- Tap on Select on the top-right corner of the screen and then tap on all the photos you want to import to your Macbook
- Tap on the Share icon on the bottom-left of the screen.
- Choose the AirDrop icon.
- Tap on your Macbook’s name, which will only appear when the Bluetooth and WiFi are switched on both the devices.
Step 2: On your Macbook, click on the Accept button.

Step 3: Then tap on the Done option at the top-right of your iPhone’s screen.

Also read: How to log out of Messenger on the iPhone?

