While mostly stable, every once in a while, Windows OS runs into random bugs and glitches that can sometimes even cause BSoDs. These errors are quite a headache to resolve as they keep crashing your PC out of the blue.
In this article, we’re talking about how you can fix the Nvlddmkm.sys failed error caused by Nvidia drivers on Windows.
Update your OS
In such situations, the first thing to do is to make sure your OS is up to date. Developers usually diagnose these issues based on insider reports or feedback from customers and issue fixes or patches in the form of updates. Check to ensure you’ve got the latest update installed on your system.
You can check out our detailed guide on how to update Windows here.
Also read: Nvidia RTX 3060 vs RTX 3050
Update your GPU drivers
The GeForce Experience utility is Nvidia’s in-house tool that can help you stay on top of driver updates and help you manage and optimise your games according to your graphics card and other corresponding PC hardware.
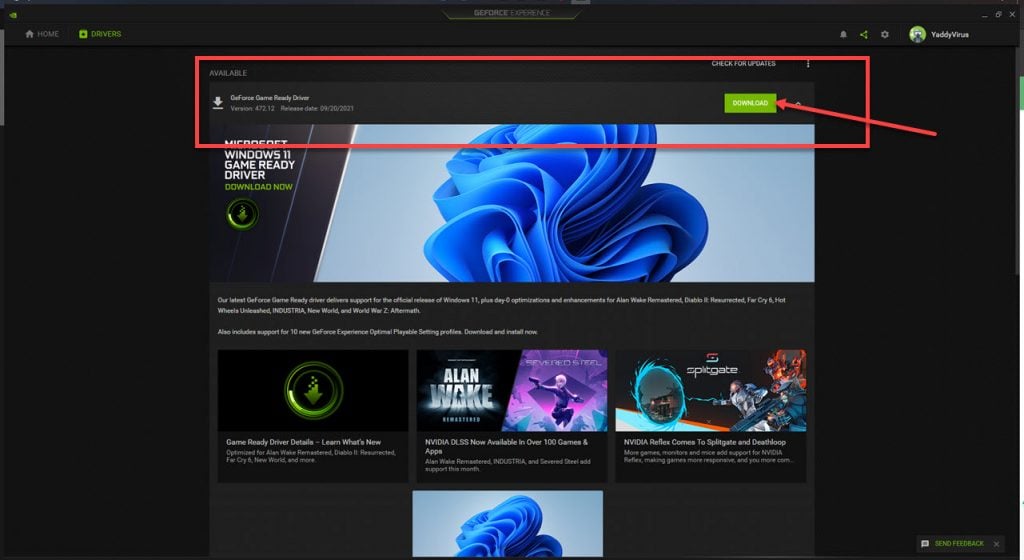
Updating drivers through the tool is also relatively easy. Open the GeForce Experience tool and head over to the Drivers tab. If there’s an update available, it’ll show you an option to download the driver update right away and install it with minimal hassle.
You can also use the Check for updates button to manually check for any updates that may be available. Once updated, the Nvlddmkm.sys failed error should be resolved.
Reinstall the graphics driver
If updating didn’t work, try reinstalling the driver from scratch
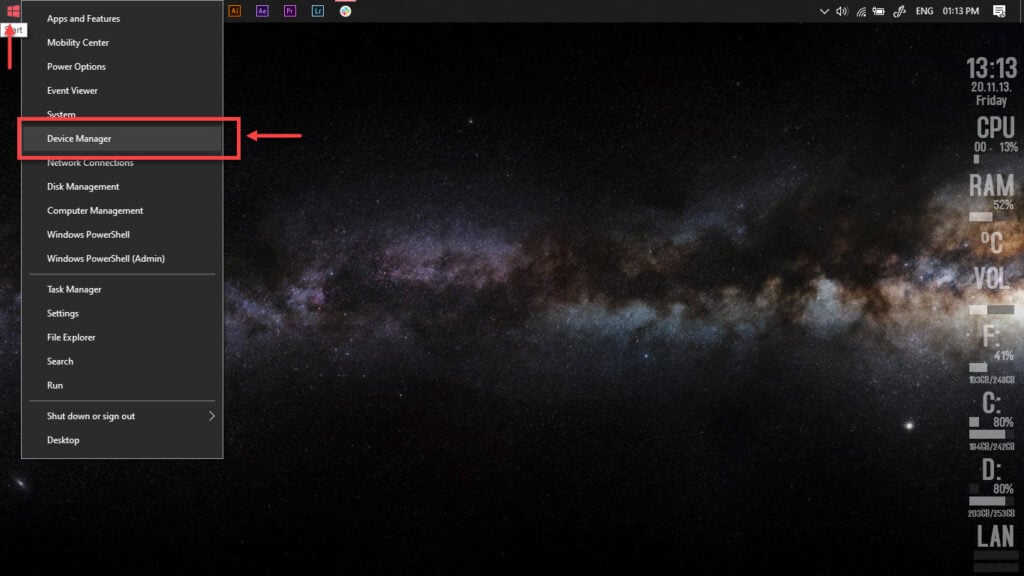
Step 1: Right-click Start and select Device Manager from the menu.
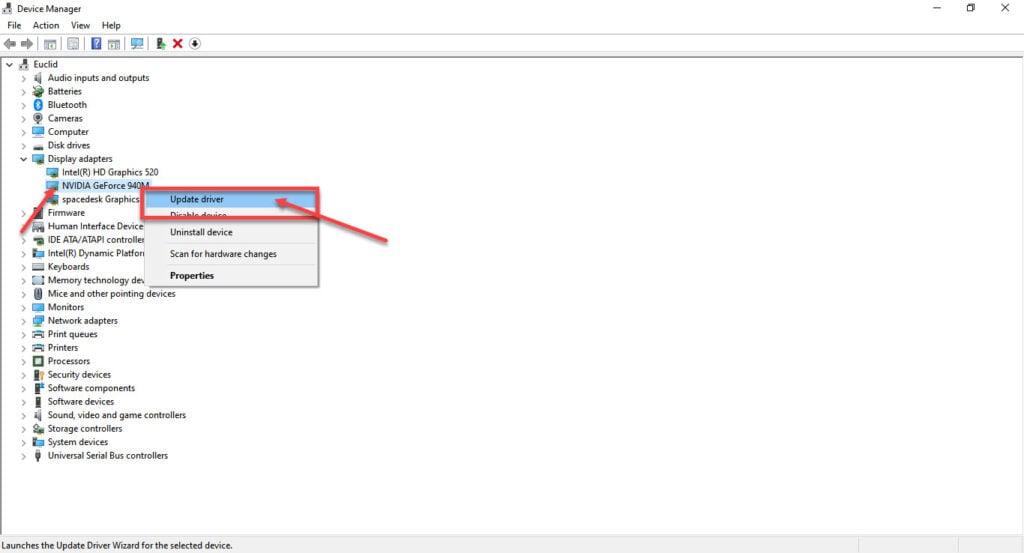
Step 2: Under Display Adaptors, find your graphics card’s name, right-click on it and click on Update Drivers.
Step 3: Click on Search automatically for drivers. Windows will automatically look for and download the latest drivers for your particular GPU.
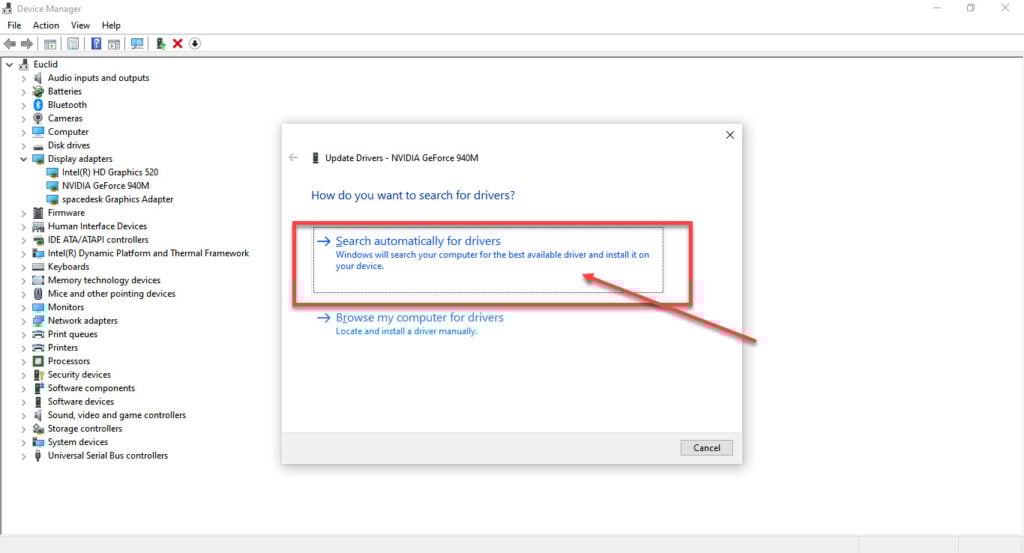
While this should help resolve the error, in case it doesn’t, click Uninstall device in step two and restart your PC to force Windows to install the required drivers. You can then update them later.
Also read: How to check CPU, GPU and RAM usage in Windows 11?
Run the Check Disk utility
The BSOD can signify some critical Windows or driver files being corrupt. Try running the check disk utility to check whether everything is in working order.
You can refer to our detailed guide here on how to run the check disk utility.
Run an SFC scan
Corrupt files are the number one reason your PC might behave weirdly. Here’s how you can get rid of them and potentially resolve your issue.
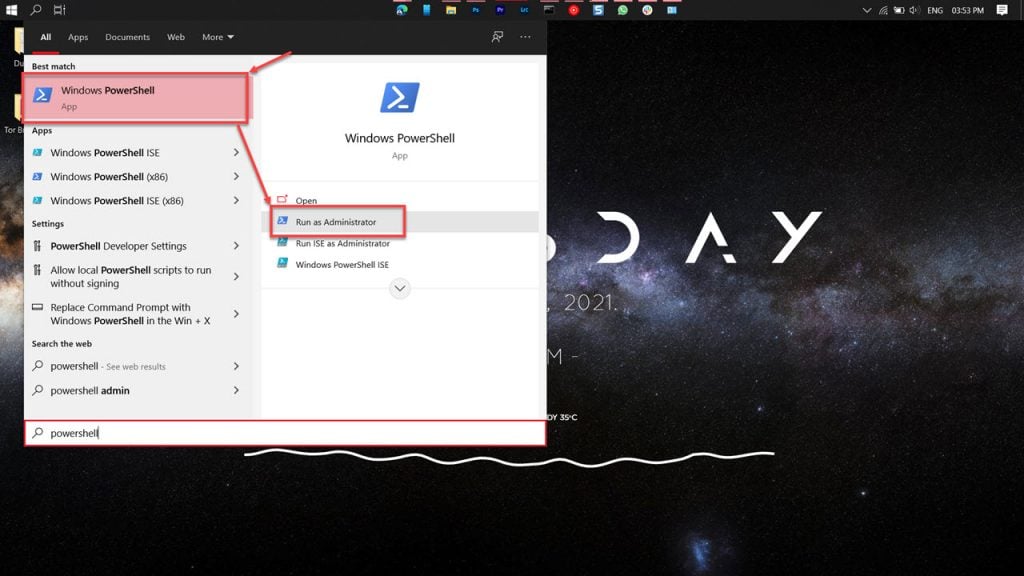
Step 1: Press Windows Key + S to bring up the Cortana/Search box and search for Powershell. Open Windows Powershell from the search results.
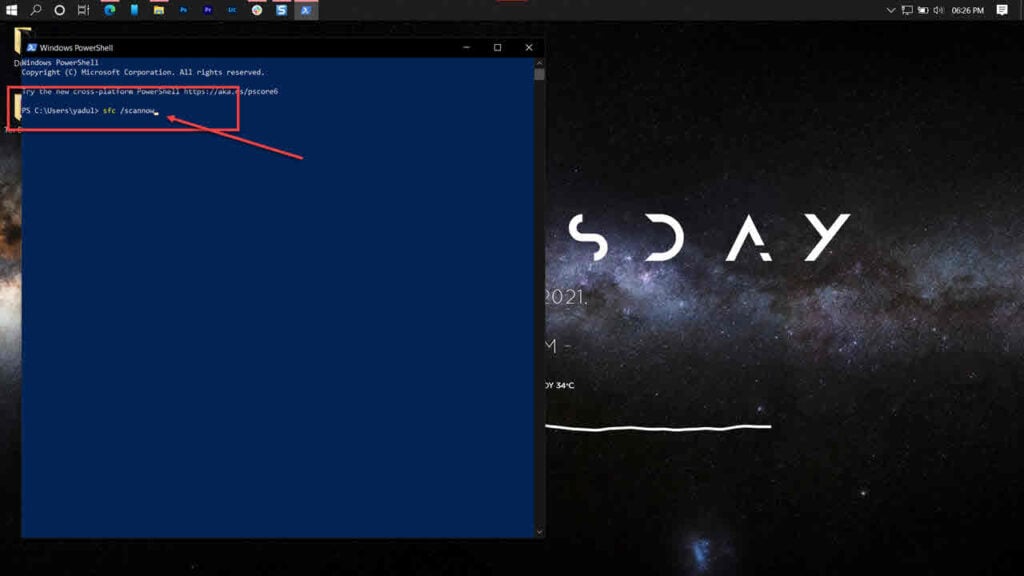
Step 2: Type sfc /scannow to scan your system for issues.
Step 3: If the SFC scan finds any problems, use the following command to resolve them.
DISM /Online /Cleanup-Image /RestoreHealth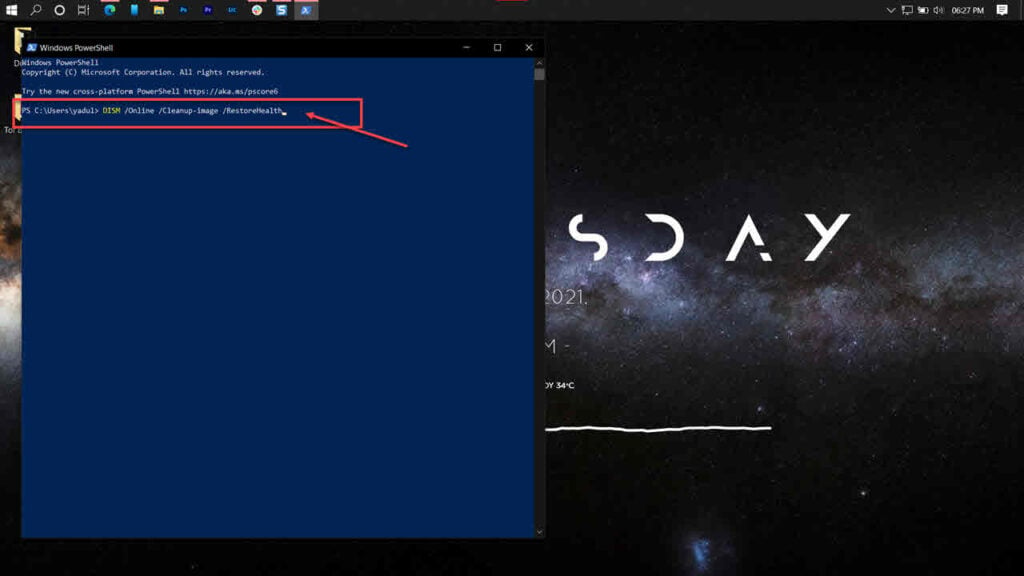
Restart your PC, and the Nvlddmkm.sys failed error should be resolved. If that doesn’t help, you can also run a DISM scan to fix any other errors by using this guide.
Reinstall all Nvidia applications
If nothing else works, try reinstalling all Nvidia applications from scratch.
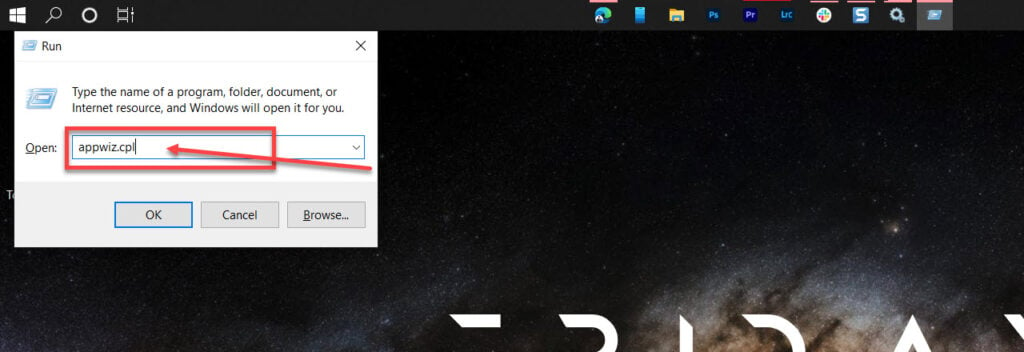
Step 1: Press Windows Key + R to open the Run prompt. Type appwiz.cpl and hit enter.
Step 2: Find all Nvidia programs in the list and uninstall them. Restart your PC once you’re done.

Step 3: Once your PC has booted up, try reinstalling the Nvidia driver and Geforce experience from the driver download page.

This process will reinstall the corrupt files and should resolve the Nvlddmkm.sys failed error.
Also read: How to update Nvidia Graphics Driver?


