Windows 11 is the latest and greatest that Microsoft’s flagship operating system has to offer. This latest release of Windows modernises the aesthetic and brings a bunch of useful features into the OS, but it’s still far from perfect.
Sometimes random bugs or glitches can hinder your PC’s functionality. In this article, we’re talking about how you can reset all audio settings in Windows 11 to resolve any audio-related bugs you might be facing.
Also read: How to fix Incorrect Windows 11 Audio icons?
Resetting Audio settings in Windows 11
Here are seven ways you can reset audio settings in Windows.
Reset sound settings for third-party programs and apps
First up, start off by resetting the sound settings for third-party apps and programs. Here’s how.
Step 1: Press Windows key + I to open Windows settings and click Sound.
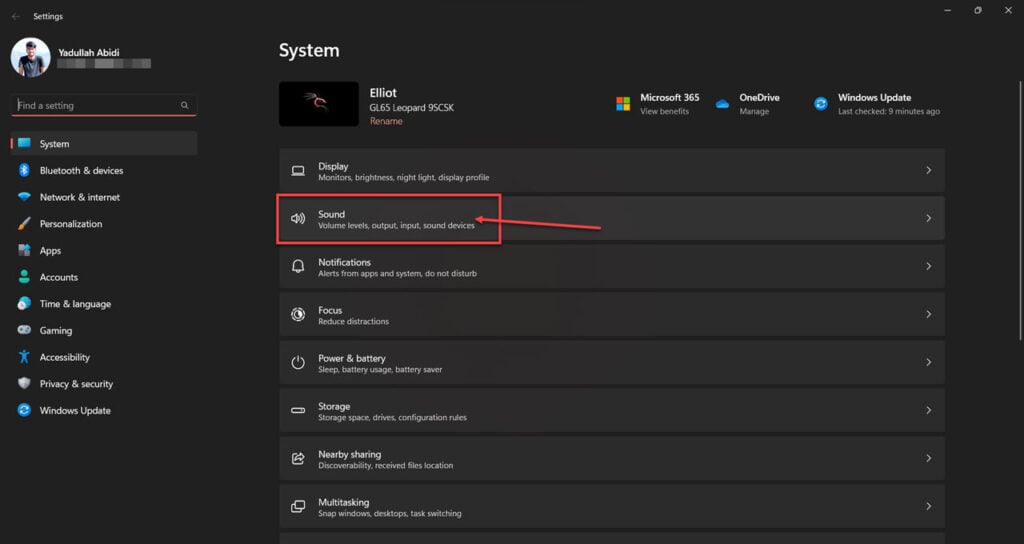
Step 2: Scroll down and click Volume Mixer under Advanced.

Step 3: Scroll down and click the Reset button in front of Reset sound devices and volumes for all apps to the recommended defaults.

Update audio drivers
Since the error is audio-related, updating the audio drivers on your PC will often fix the problem.
Step 1: Press Windows Key + X and click on Device Manager.
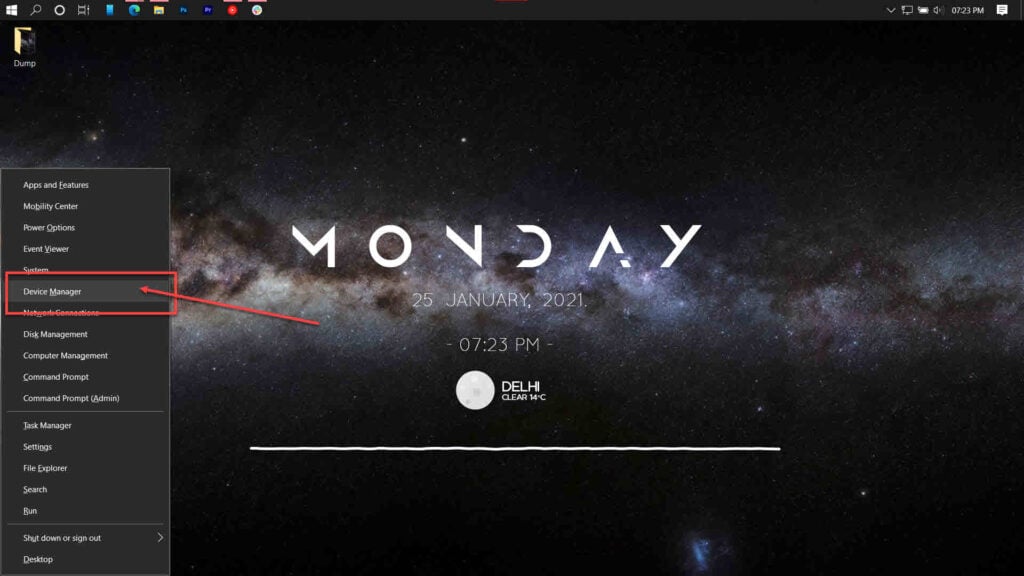
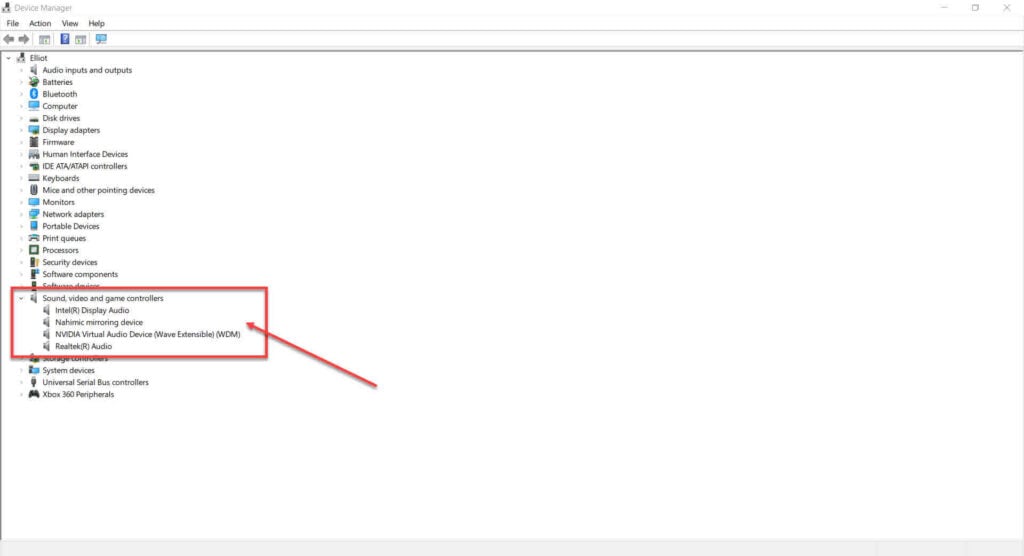
Step 2: Double-click on Sound, video and game controllers to show all visible audio devices.
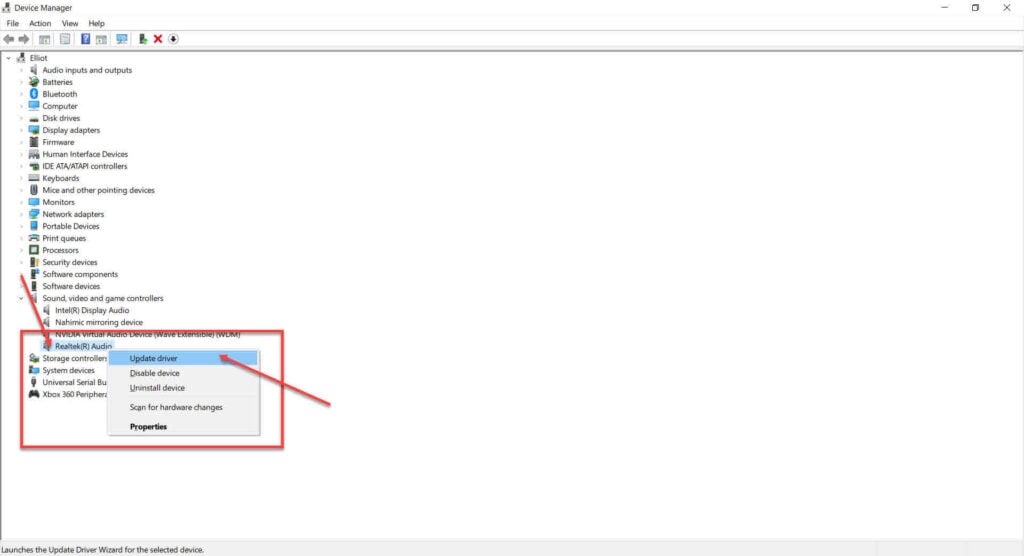
Step 3: Right-click your audio device and click on Update drivers.
Step 4: Click Search automatically for drivers, and Windows will automatically download and install any driver updates needed.
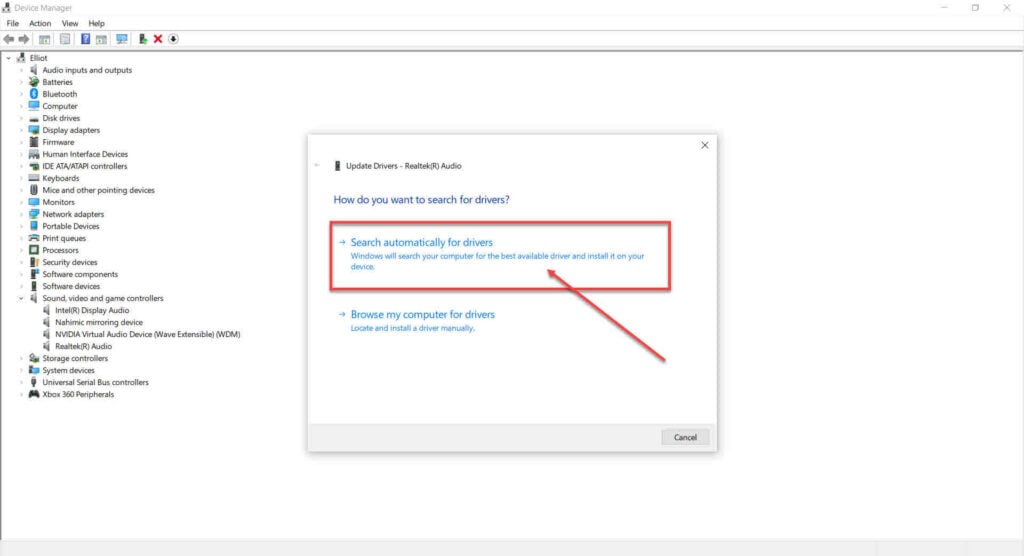
If this doesn’t work, you can follow the same steps to uninstall the audio drivers and restart your PC to install them again.
Rollback the audio driver
You can also opt to roll back to a previous version of the driver working fine for you. Here’s how.
Step 1: Press Windows key + R, type in devmgmt.msc and hit enter.
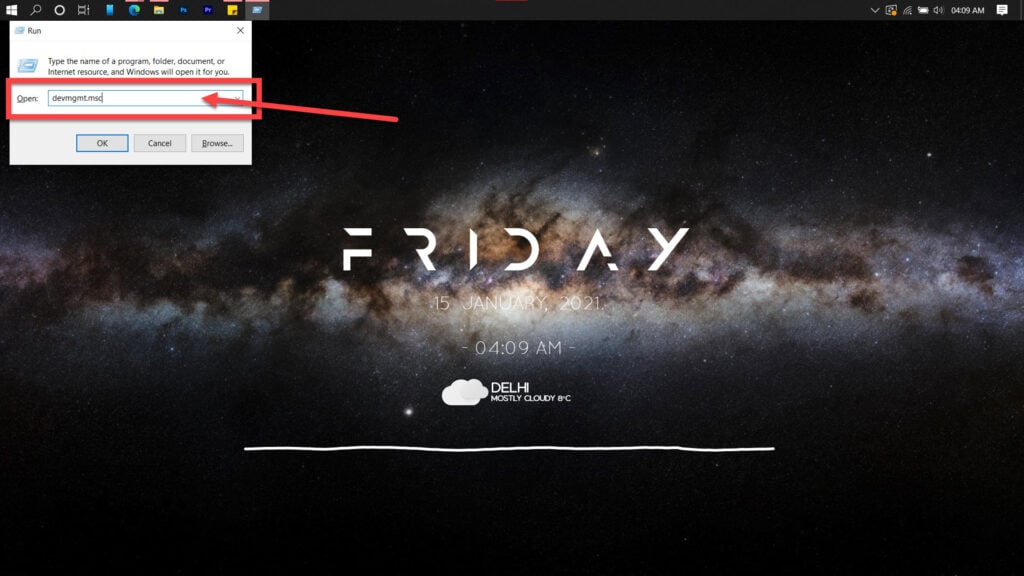
Step 2: Double-click your audio device to open its properties.

Step 3: Under the Drivers tab, click Roll Back Driver. If the option is greyed out for you, the driver can’t be reverted to an older version or is already on the oldest version.
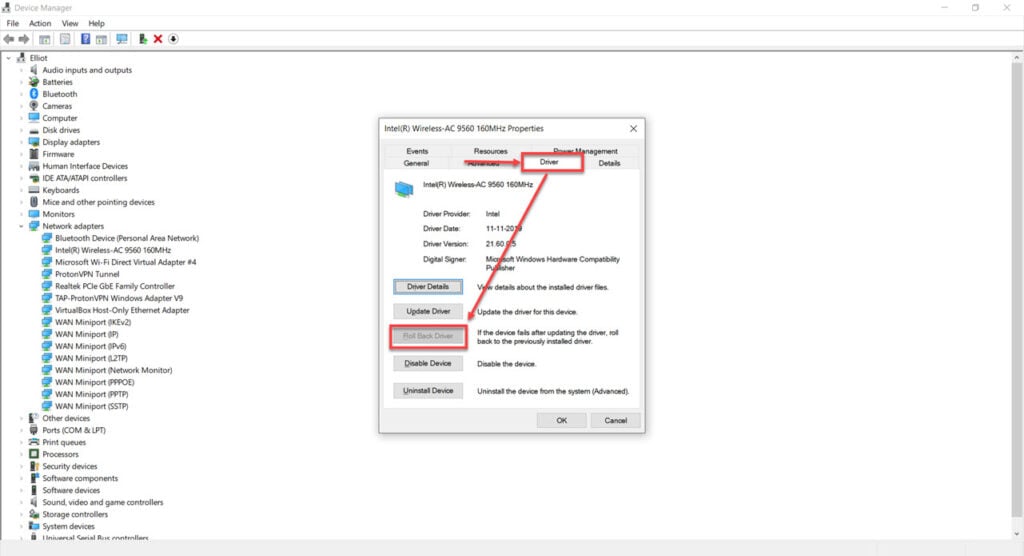
Restart your computer and try using it with the older driver. It should work fine for you now.
Restart Windows Audio services
Step 1: Press Windows Key + R to open the Run prompt. Type services.msc and hit enter.
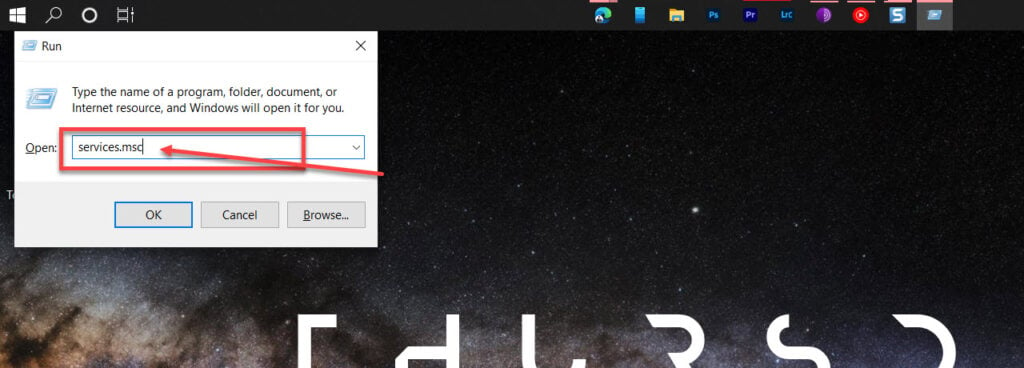
Step 2: Locate the Windows Audio service and double-click it to open its properties.
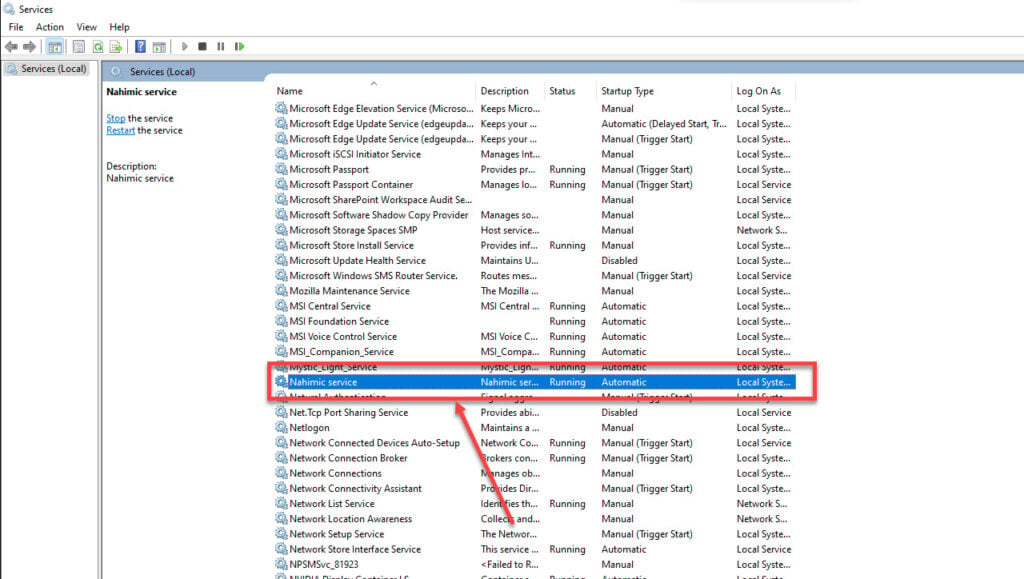
Step 3: Under the Startup type dropdown, select Automatic.
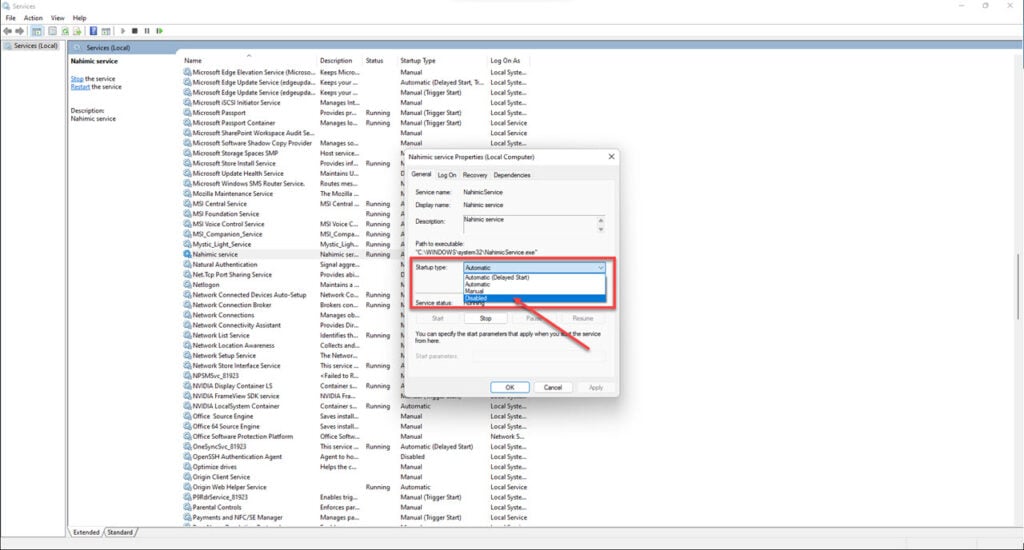
Now restart your PC and you’d be good to go.
Use Windows troubleshooter
Windows comes in with a number of helpful troubleshooters that can automatically detect and fix any issues. Here’s how you can run the audio troubleshooter in Windows 11.
Step 1: Press the Windows key and search for Audio troubleshooter. Click the corresponding search result.
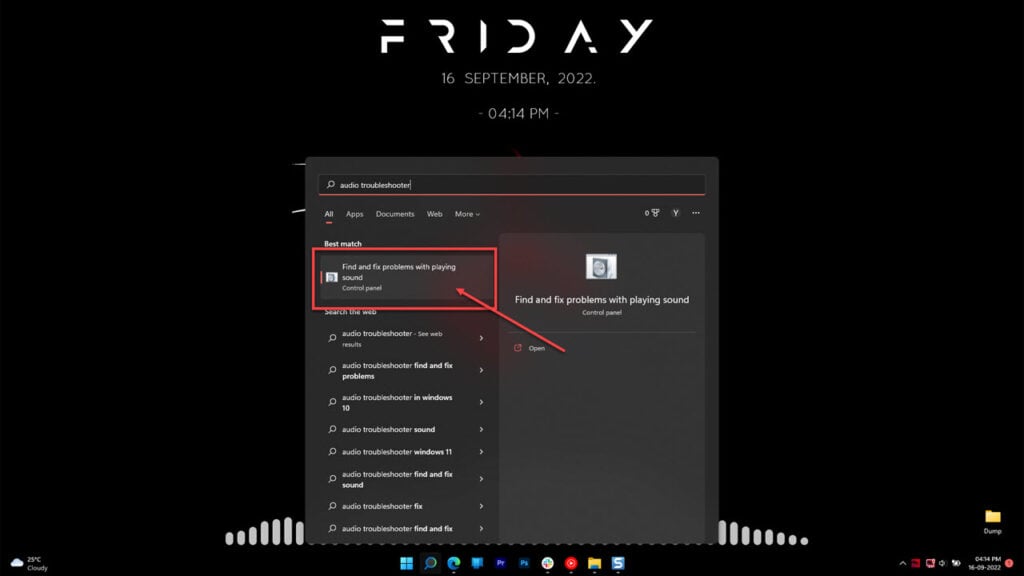
Step 2: Follow along with the troubleshooter and let it carry out any suggested fixes.

Restart your PC and the audio should be in place.
Reset system sounds to default
In case you’re having an issue with Windows system sounds, here’s how to reset them to the default settings.
Step 1: Press the Windows key and search for Change system sounds. Click the corresponding search result.

Step 2: Under the Sound Scheme drop-down, select Windows Default and click Apply.

Reset your PC
If nothing else works, the best way to get rid of the error is by simply reinstalling or repairing your OS.
The Windows Media Creation tool is a great way to install Windows and repair the OS. Using this, you can perform a clean installation or repair your OS without affecting your data.
You can download the Media Creation Tool here


