Upcoming Windows features are often tested in insider and preview builds that only a handful of people participating in special programs get. Even if these features trickle down to production versions, they’re often hidden behind APIs and can be inaccessible.
Thankfully, there are several tools to bring out these hidden features and make them accessible to everyday Windows users. In this article, we’re talking about Vivetool, what it is, what it does and everything you need to know to use the program.
What is Vivetool?
Vivetool is an implementation of Vive, a C# library you can use to make programs that interact with the A/B experiment mechanism in Windows. Vivetool uses this library to unlock new APIs allowing power users to use these experimental and hidden features instantly.

The tool doesn’t have any special requirements either; you just need to be running Windows 10 build 18963 or newer. There are both command line and GUI versions available as well. That said, if you’re using the GUI version, you also need .Net framework 4.8
Also read: How to fix Dell Monitor error: No DP signal from your device?
How to use Vivetool?
Before you can get to using Vivetool, you need to decide whether you want the command line or GUI version of the program. The command line version is more stable, albeit harder to work with and the GUI version makes things simpler, but can also break things on your computer.
Regardless of the version you choose, keep in mind that these are experimental features and things can go wrong when using them. Fixing this problem can be as simple as simply reverting the change or might even require you do to an entire Windows reinstall in extreme cases.
You can download the command line version here, or the GUI version here. For this article, we’ll be going ahead with the GUI version as that’s the simpler one to use. Once you’re done downloading and installing the program, enabling features is a simple matter of selecting the build version and toggling whatever feature you want.
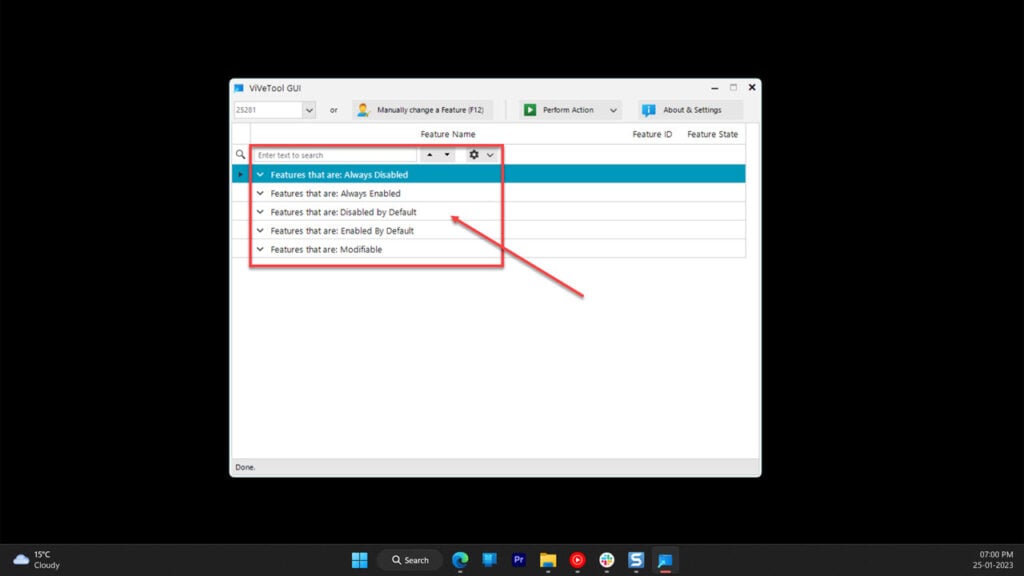
Step 1: Open the Vivetool GUI and select the Build version from the top left corner. Keep in mind that it can be any build number based on what feature you want. We’ll be going with build 25281.

Step 2: Once the program is done loading all the features, you’ll see them divided into the following five categories.
- Features that are: Always Disabled
- Features that are: Always Enabled
- Features that are: Disabled by default
- Features that are: Enabled by default
- Features that are: Modifiable
Select the category you want to see all the features for your selected build.

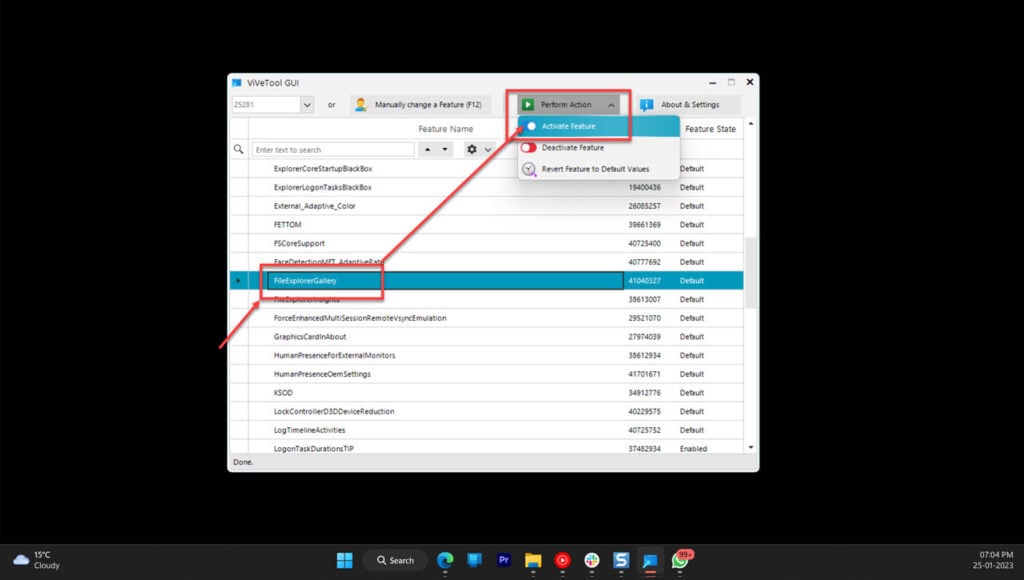
Step 3: Select the feature you want, click the Perform Action button and enable or disable the feature according to your needs.

Also read: Lenovo laptop not charging: 4 Fixes


