One of the most important aspects of a PC’s configuration is the amount and type of VRAM running. VRAM or better known as your GPU, is a processing unit that specialises in the graphics department.
Anything that you see on your computer screen goes through your GPU. Naturally, the better your GPU and the more memory it has, your graphics performance will be better.
Knowing exactly how much VRAM you have can help you understand what games and software you can run on your machine smoothly, and it’ll also let you know when it’s time to get an upgrade.
Also read: How to check GPU temperature in Windows 10?
Finding out VRAM in Windows 10
There are a couple of ways you can find this out. We’re going to discuss both of them.
Using Windows Settings
Step 1: Open Windows Settings by pressing Windows Key + I. Then go to System.

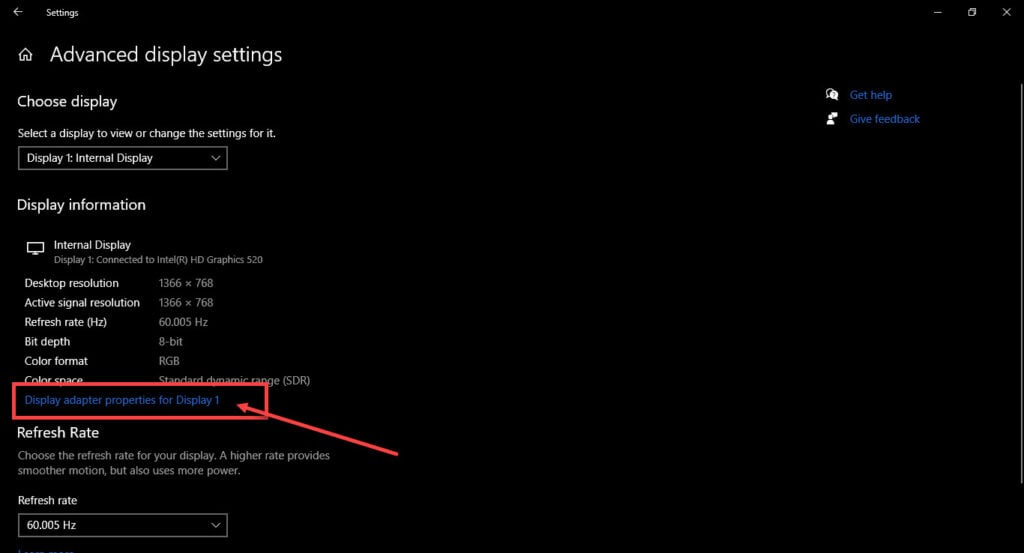
Step 2: Under the Display tab. Scroll down to find Advanced display settings.

Step 3: Click on Display adaptor properties for Display 1. You might see something different here depending upon how many monitors you’ve hooked up to your machine and which one is your primary display.

A new window will show up, and you’ll be able to see just how much VRAM you have. However, if you’re running a laptop with a dedicated graphics card, you might not be able to see it here.

Also read: How to disable anti-virus in Windows 10?
Using the DirectX Diagnostic tool
Using this tool, you’ll be able to see both your integrated and your dedicated GPU memory. This method will also work on just about any version of Windows.
Step 1: Press Windows Key + R to open the run window and type in dxdiag. This is going to launch the DirectX Diagnostic Tool.

Step 2: Your dedicated GPU memory will be under the Render tab, while your integrated memory will be under the display tab.

Also read: What is GPU scaling? Types and how to enable scaling?


