Windows is a relatively stable OS, but it does face some issues from time to time. BSODs aren’t that common, but there are a hundred things that can go wrong and cause one for you.
In this article, we’re taking a look at what is Volmgr.sys and how problems with it can cause BSODs for you. We’ll also be giving you several fixes for the problem.
What is Volmgr.sys?
Volmgr.sys is a volume manager drive file that manages your drive data storage and management. Problems with this file, especially on the Windows partition, can cause random crashes causing BSODs.
There are several reasons why this might happen, including:
- Damaged hard drive
- Bad sectors
- Corrupted or damaged drivers
- Software problems.
Also read: Dump file creation failed due to an error during dump creation: 7 Fixes
6 ways to fix the Volmgr.sys BSOD error
Here are a few simple fixes you can try to fix the Volmgr.sys BSOD error.
Update your PC
The first thing you should do is to update your PC. Updating your PC will, in most cases, update your drivers and fix any issues in the process.
Check out this detailed guide to know how to update your PC here
Run an SFC scan
Corrupt files are the number one reason your PC might behave weirdly. Here’s how you can get rid of them and potentially resolve your issue.
Step 1: Press Windows Key + S to bring up the Cortana/Search box and search for Powershell. Open Windows Powershell from the search results.
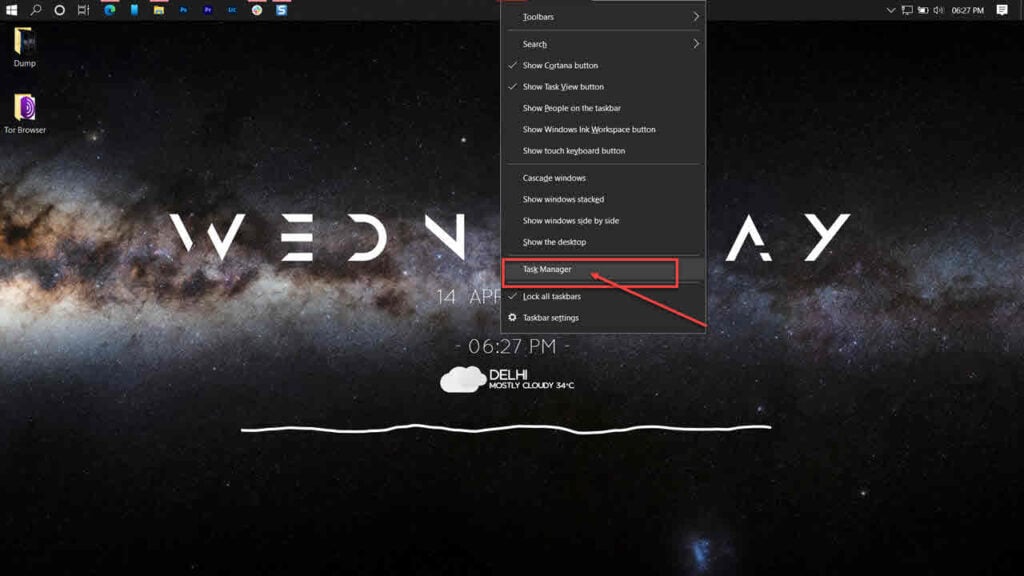
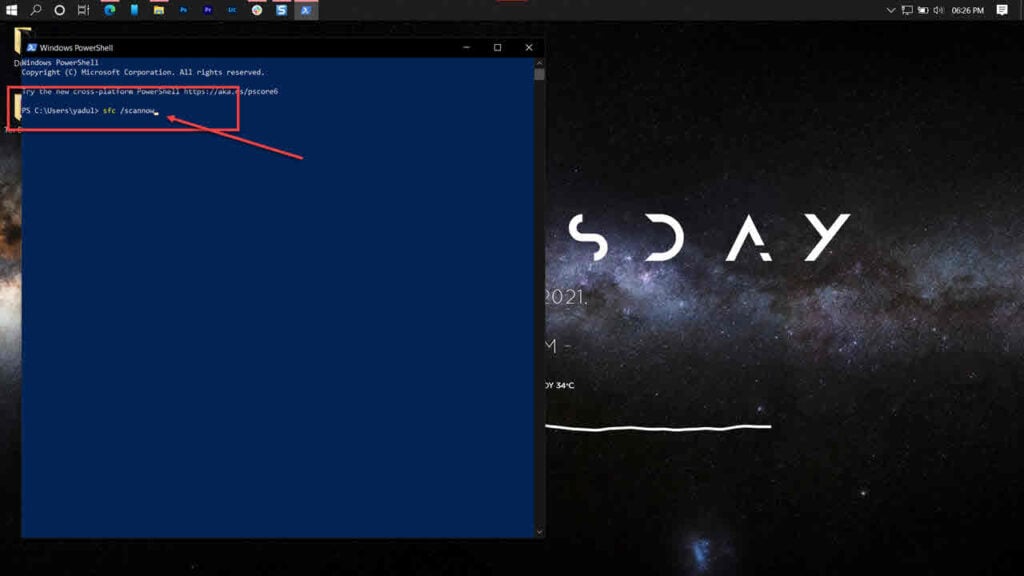
Step 2: Type sfc /scannow to scan your system for issues.
Step 3: If the SFC scan finds any problem, use the following command to resolve them.
DISM /Online /Cleanup-Image /RestoreHealth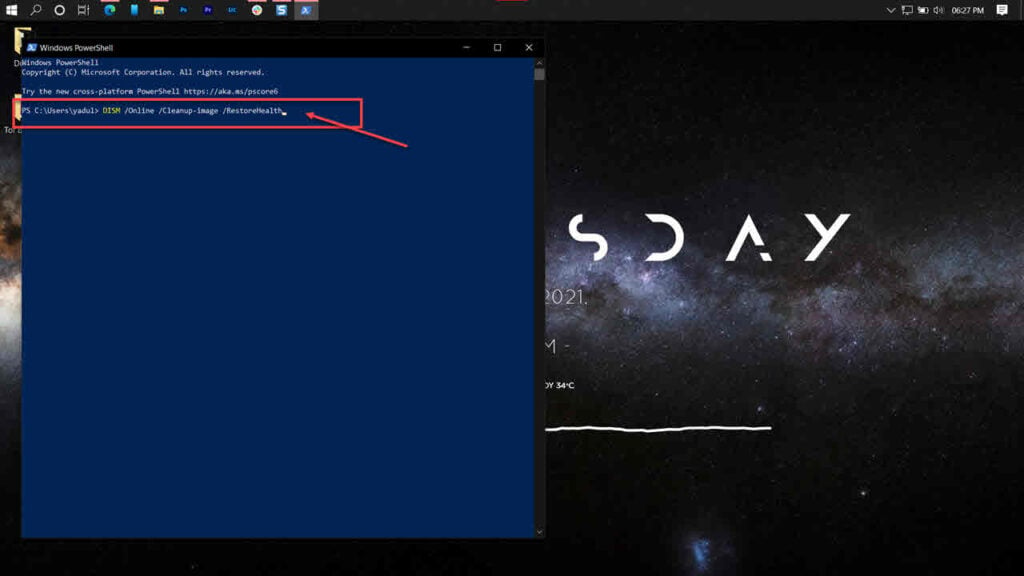
Restart your PC, and the Volmgr.sys error should be gone.
Also read: How to stop the ‘Fixing C Stage 2’ issue in Windows?
Remove Microsoft Access
Sometimes during installation, Microsoft Access can corrupt your volmgr.sys file. This can cause all sorts of problems as Access’ own files overwrite the rules dictated by volmgr.sys. In such cases, uninstalling Access is your best option.
Update your drivers
Updating (or uninstalling the problematic driver can also fix the problem.
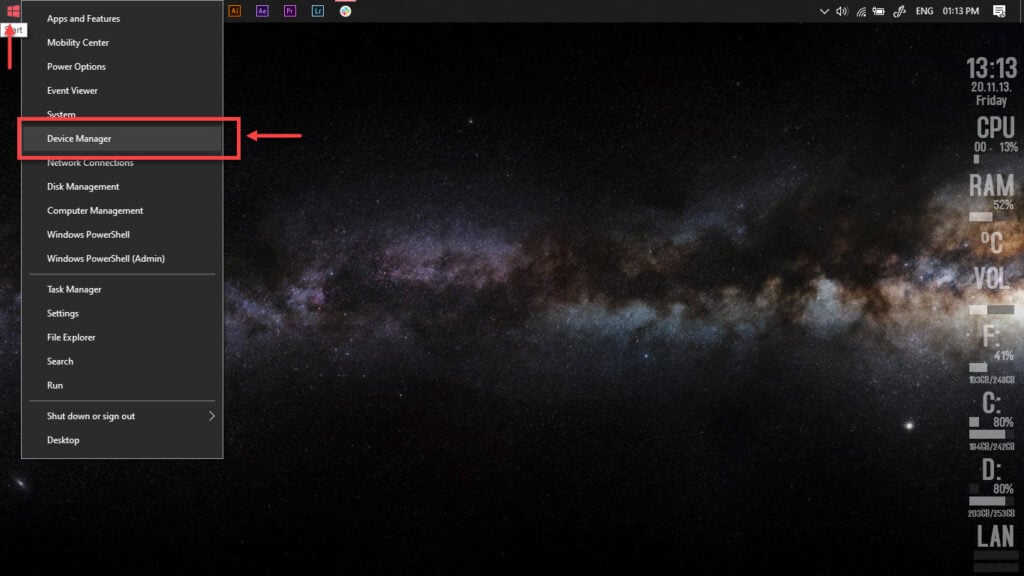
Step 1: Right-click Start and select Device Manager from the menu.
Step 2: Expand the problematic driver, right-click on it and click Update driver.
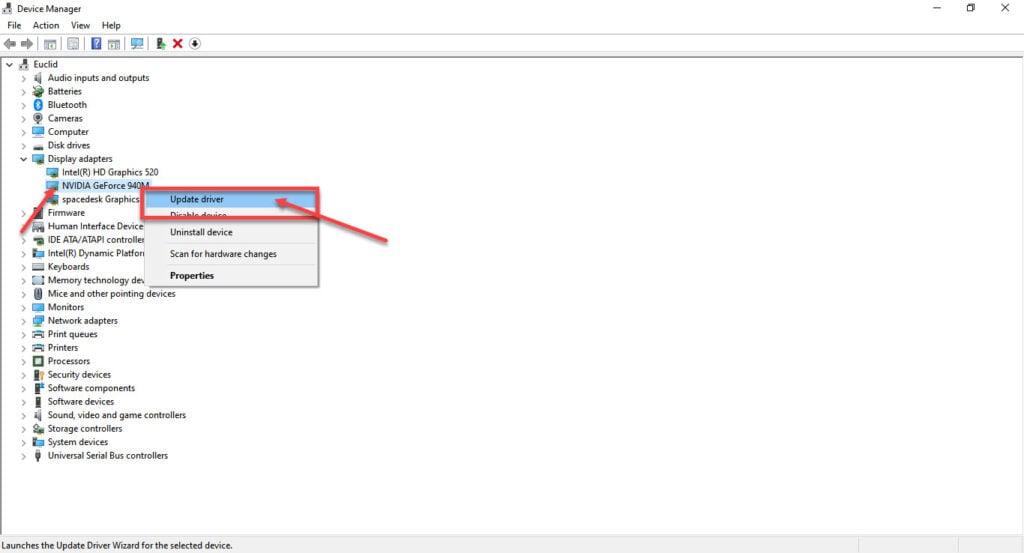
Step 3: Click on Search automatically for drivers. Windows will then automatically look for and download the latest drivers.
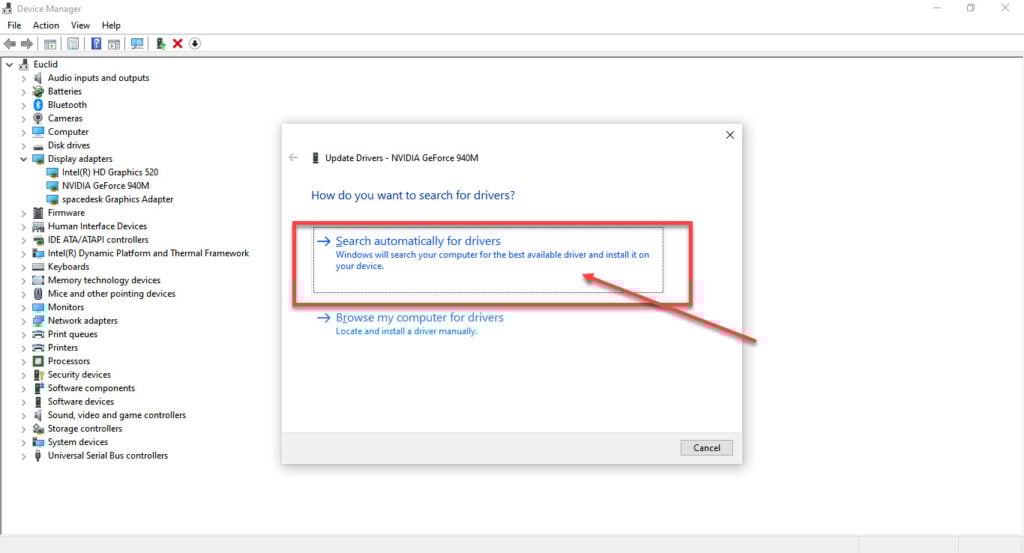
While this should help resolve the error, in case it doesn’t, click Uninstall device and restart your PC to force Windows to install the required drivers. You can then update them later.
Also read: How to fix the ‘Ea.com/unable-to-connect’ error?
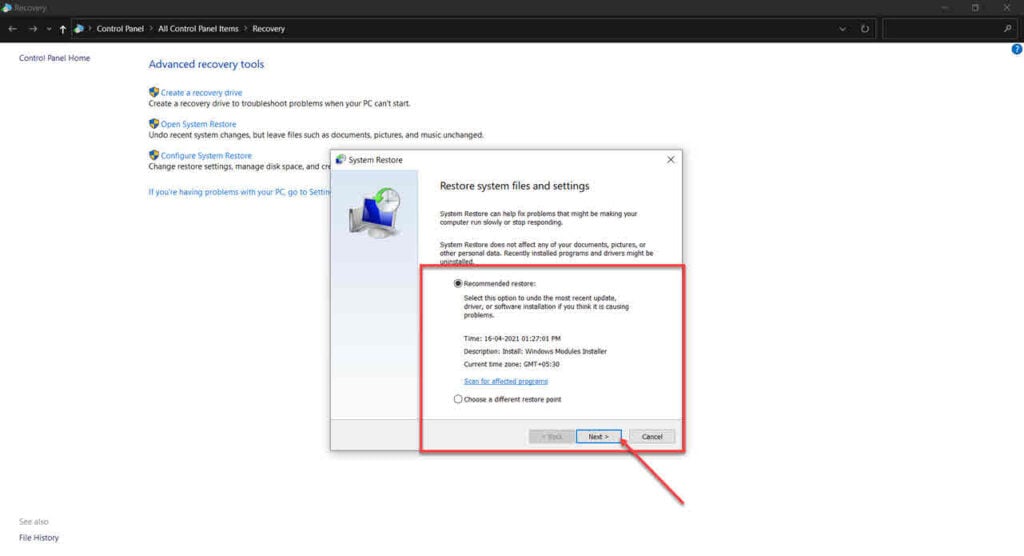
Restore to a previous backup
Restoring your system to a previous state when everything was working fine can often help solve BSOD problems on Windows.
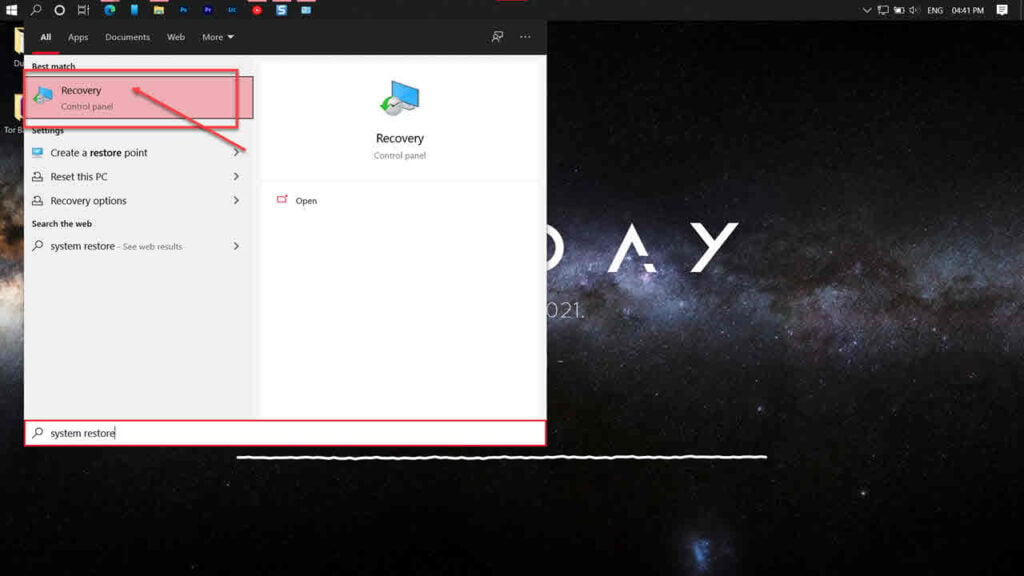
Step 1: Press the Windows key and search for Reset this PC. Then, launch the Recovery setting from the search results.
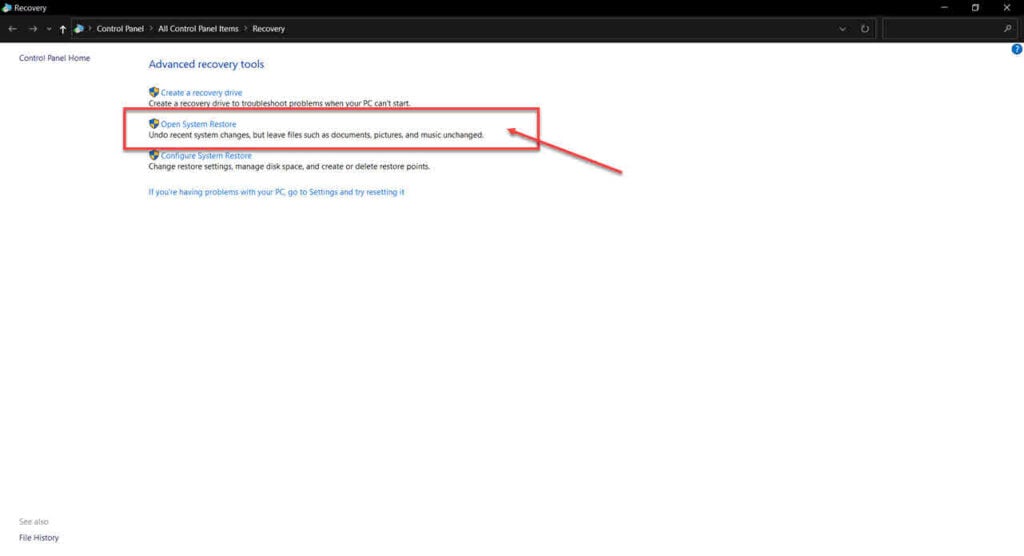
Step 2: Click on Open System Restore.
Step 3: Select the recommended restore point and click the Next button to proceed.
Repair your system
If nothing else works, the best way to get rid of the error is by simply reinstalling or repairing your OS.
The Windows Media Creation tool is a great way to install Windows and repair the OS. Using this, you can perform a clean installation or repair your OS without affecting your data.
You can download the Media Creation Tool here
Also read: How to fix the Windows Photo Viewer: Not enough memory issue?


