Windows has a ton of useful features built in that might escape the eye of everyday users. One of these features is Remote Desktop Connection which allows native remote desktop control over the internet between two PCs running Windows. This feature functions on RDP or the Remote Desktop Protocol which usually works great but sometimes can run into issues from time to time.
In this article. we’re talking about internal errors in RDP, their causes and what you can do to fix the problem.
What causes this error?
The error can be triggered by a number of different things including but limited to the following:
- Disabled remote connection setting.
- Outdated or corrupt Windows update.
- RDP service isn’t working properly.
- Misconfigured DNS settings.
Do keep in mind that RDP is supported only in Windows 11 Pro or higher. If you’re running the Home edition of Windows, you won’t be able to use the feature.
Also read: How to restart Firestick when frozen?
How to fix this?
Here are 10 fixes you can try out.
Enable remote connections
The first thing you should do is check to see if remote connections are enabled on your PC in the first place.
Step 1: Press the Windows key and search for Advanced system settings. Click the corresponding search result.
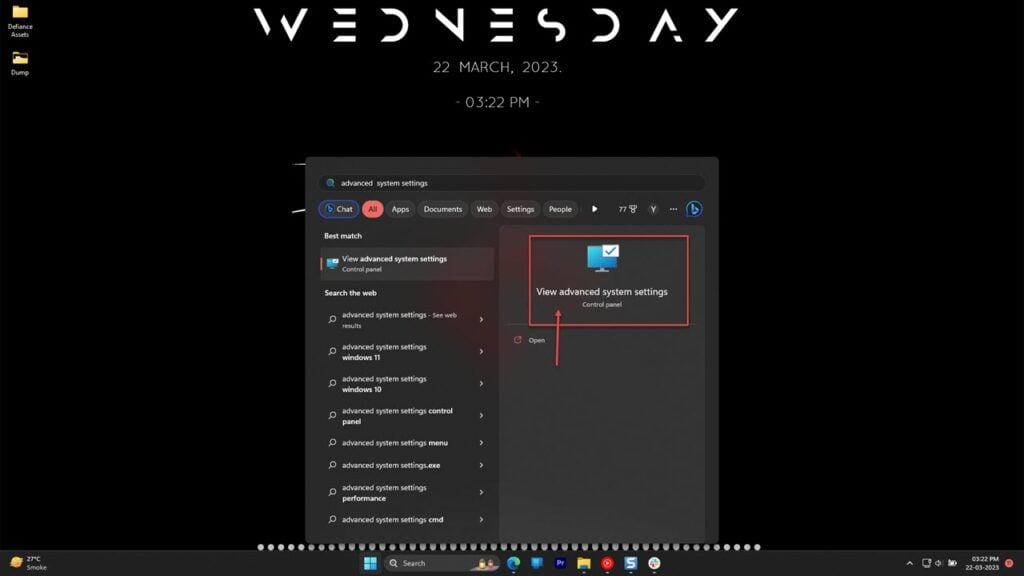
Step 2: Head over to the Remote tab and make sure that the Allow remote connections to this computer checkbox is selected.

Now restart your PC and give it another shot.
Update your PC
Another thing you should try is to update your PC. Updating your PC will, in most cases, update your drivers along with any other problematic software and fix any issues in the process.
Check out this detailed guide to know how to update your PC here
Try changing RDP security settings
While we don’t recommend messing around with security settings that you don’t exactly know, in some cases it might be helpful. Here’s how.
Step 1: Press the Windows key + R and type gpedit.msc. Click the corresponding search result.
Step 2: Head over to the following directory.
Computer Configuration > Administrative Templates > Windows Components > Remote Desktop Services > Remote Desktop Session Host > Security
Step 3: Under Security, open Require use of specific security layer for remote (RDP) connection.
Step 4: Finally, select the Enabled option in the top left.
Restart your PC once again and it should be working fine.
Enable auto-reconnect
If the person you’re trying to connect to has an unstable internet connection, you’ll experience frequent connection drops. This can be somewhat mitigated by using the auto-reconnect feature.
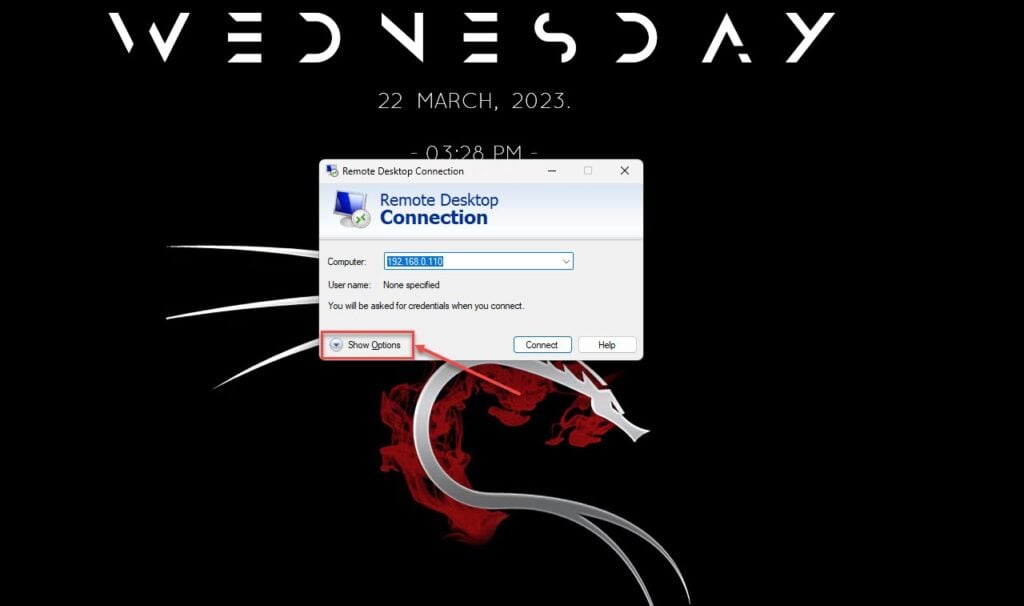
Step 1: Press the Windows key and type Remote Desktop Connection. Click the corresponding search result.

Step 2: Click Show Options in the bottom left.
Step 3: Head over to the Experience tab and check the Reconnect if the connection is dropped checkbox.
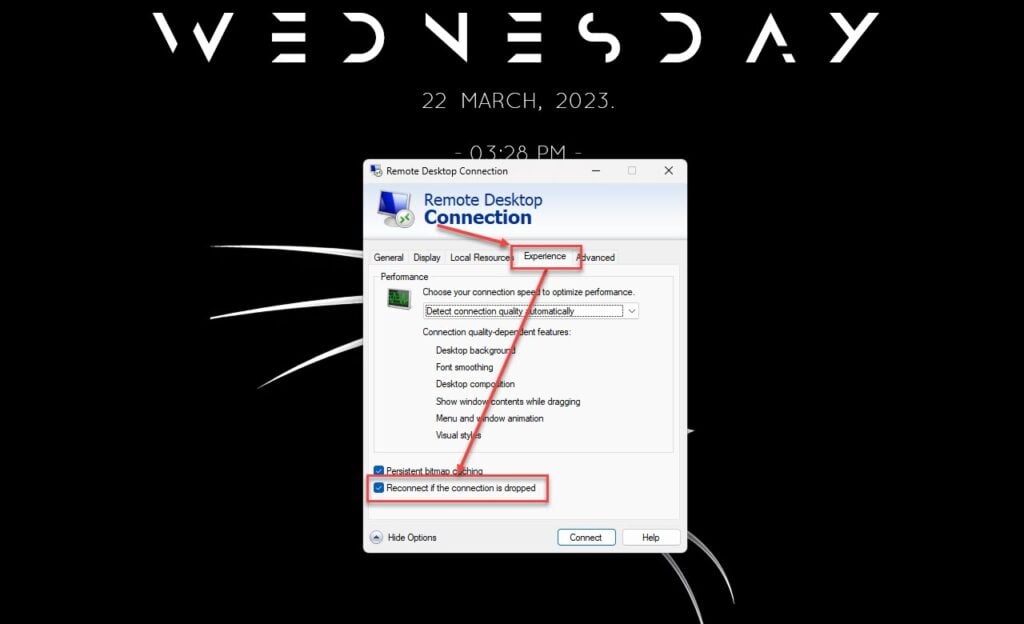
Finally, click Connect and remote connections should start working fine.
Also read: Does Lowe’s take Apple Pay?
Delete MachineKyes
Deleting your MachineKeys folder can also reportedly help resolve the issue. All you need to do is head over to the following path in the file explorer:
C:\ProgramData\Microsoft\Crypto\RSA\MachineKeysOnce found, delete the entire folder or file and you’re good to go. Windows will just try and get the required files itself and RDP should be working fine for you now.
Ensuring you have the right permissions to access and read the target file can help fix the problem. Here’s how.
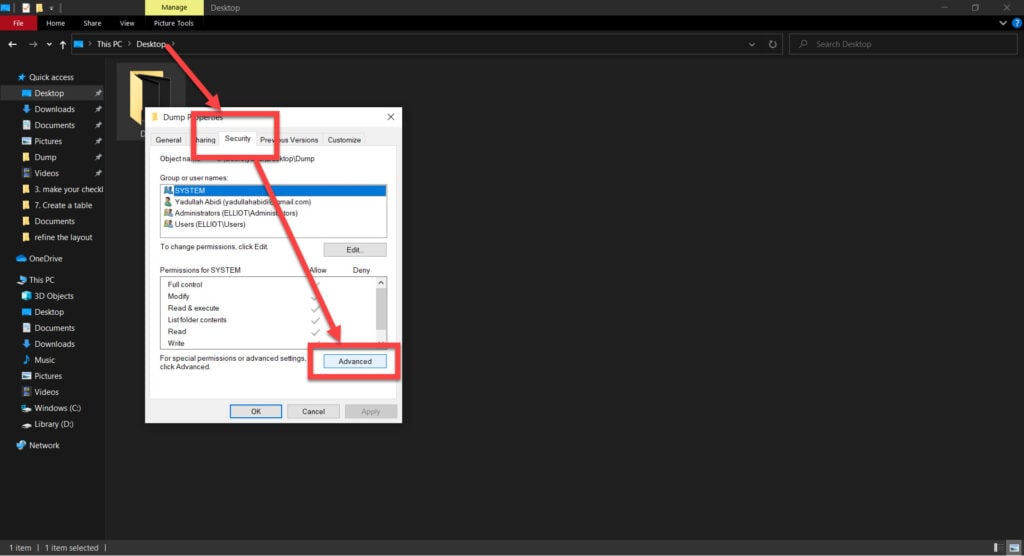
Step 1: Right-click on the file or folder you want to delete and choose Properties.
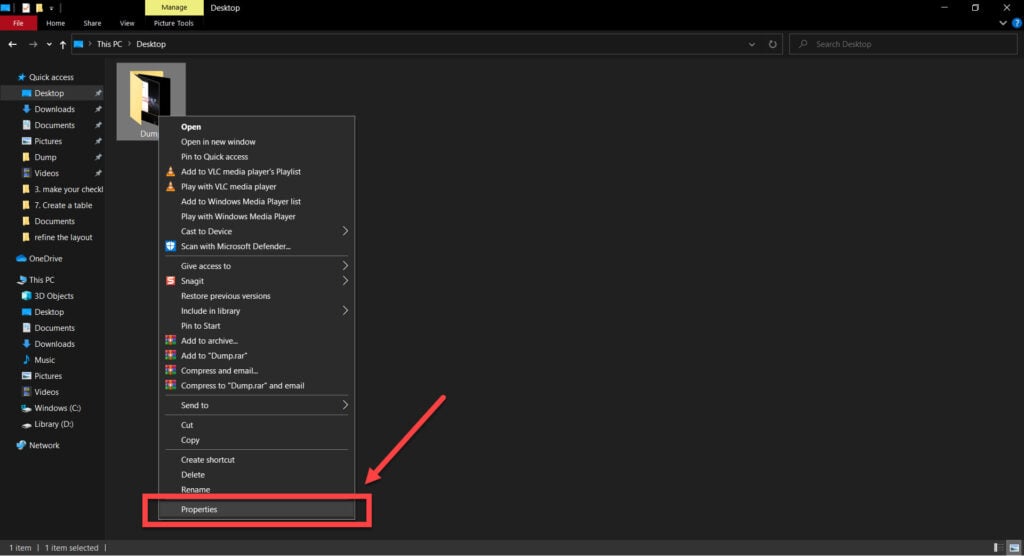
Step 2: Under the Security tab, click on Advanced.
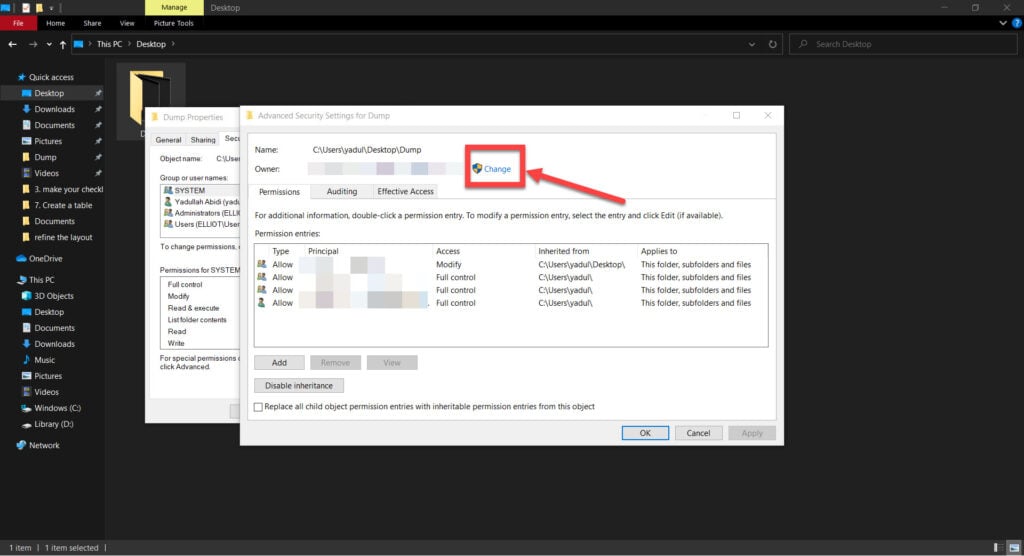
Step 3: Click on Change in front of the current Owner.
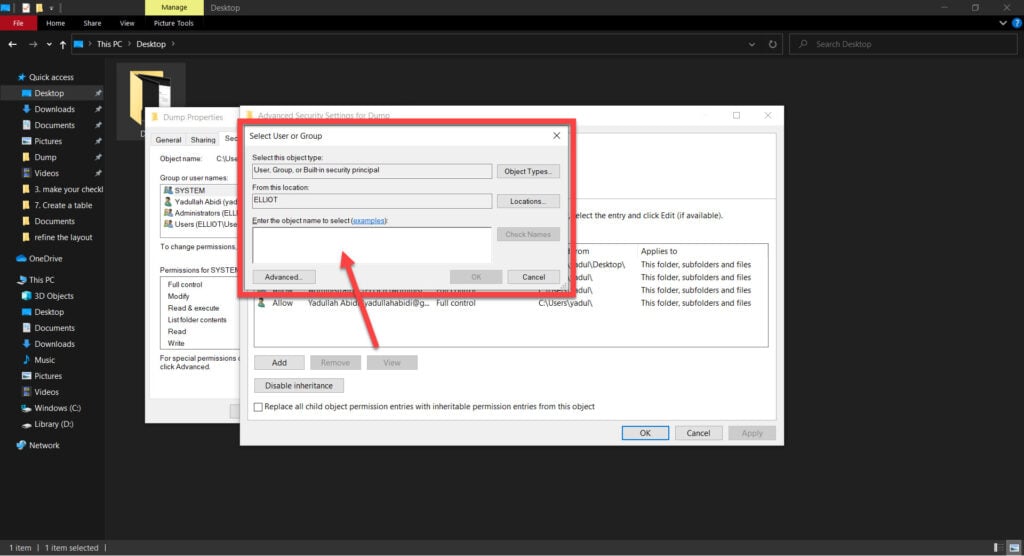
Step 4: Enter the username of the account you want to make the owner of the file/folder. Use the Check Names button to ensure you’re using the right username. Click OK when done.
Step 5: Make sure you have all the required permissions for the file. If you don’t, use the Edit… button to modify said permissions.

Try copying the file or folder again, and the error should be gone.
Disable antivirus
Overly aggressive third-party antivirus or antimalware programs can sometimes cause problems. In such cases, try temporarily disabling your antivirus to see if that makes a change.
Check out our detailed guide on how to disable antivirus in Windows here.
Restart the Windows Update Service
The Windows Update service is responsible for periodically checking for any new updates Microsoft may release. Restarting this service can help get your machine on track.
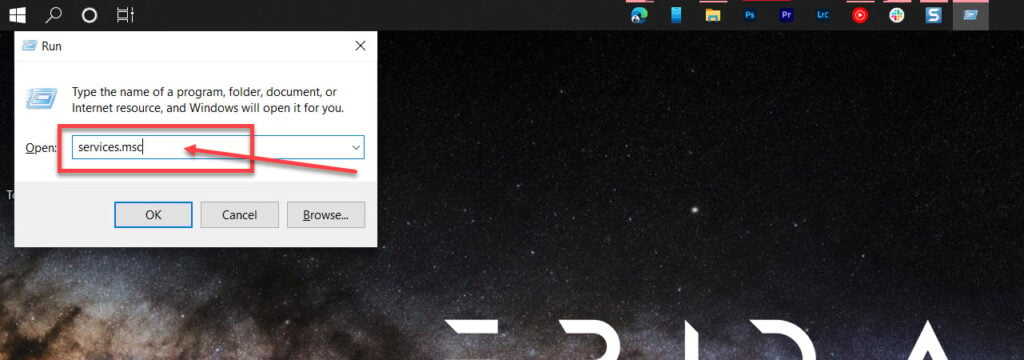
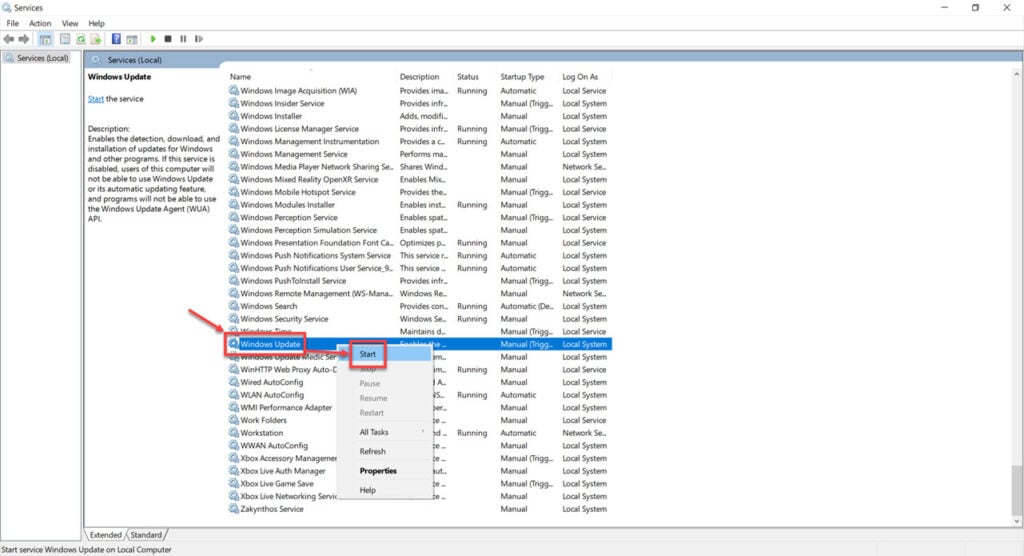
Step 1: Press Windows Key + R to open the Run prompt. Type services.msc and hit enter.
Step 2: Find the Remote Desktop Services service. Right-click it and select Stop.
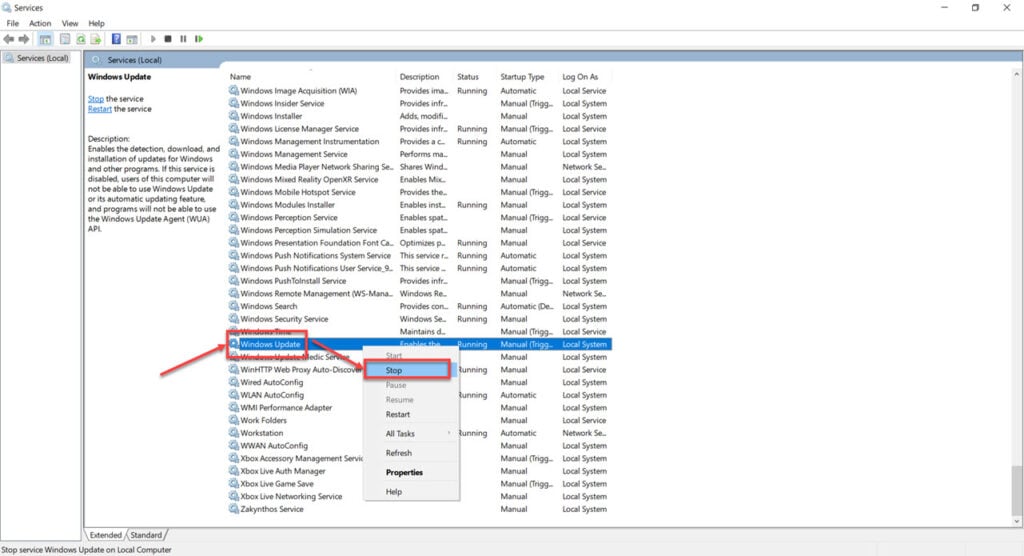
Step 3: Return to the Services Console and restart the Windows Desktop Services service in step 2.
Also read: PrepaidGiftBalance not working: Quick Fix
Disable VPN
Geo-restrictions often get in the way of software experiences. Suppose you’re playing Roblox with a VPN connection. In that case, chances are the VPN is interfering with Roblox’s update system, and there’s a regional conflict in which your IP address is placed due to the VPN and the update Roblox is sending you. Try disabling the VPN to see if Roblox works.
Try another DNS
Step 1: Press Windows key + I to open the Windows settings.
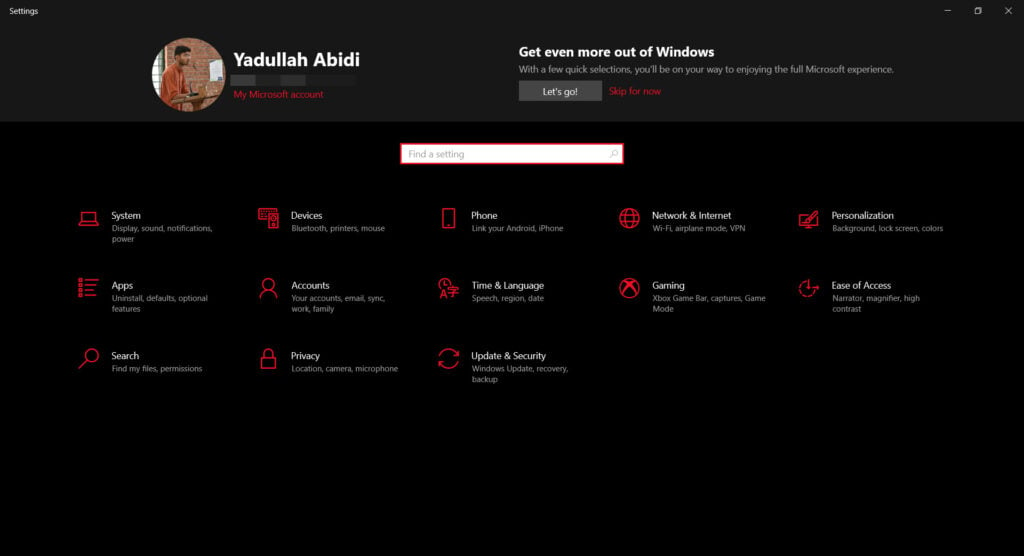
Step 2: Click on Network & Internet.
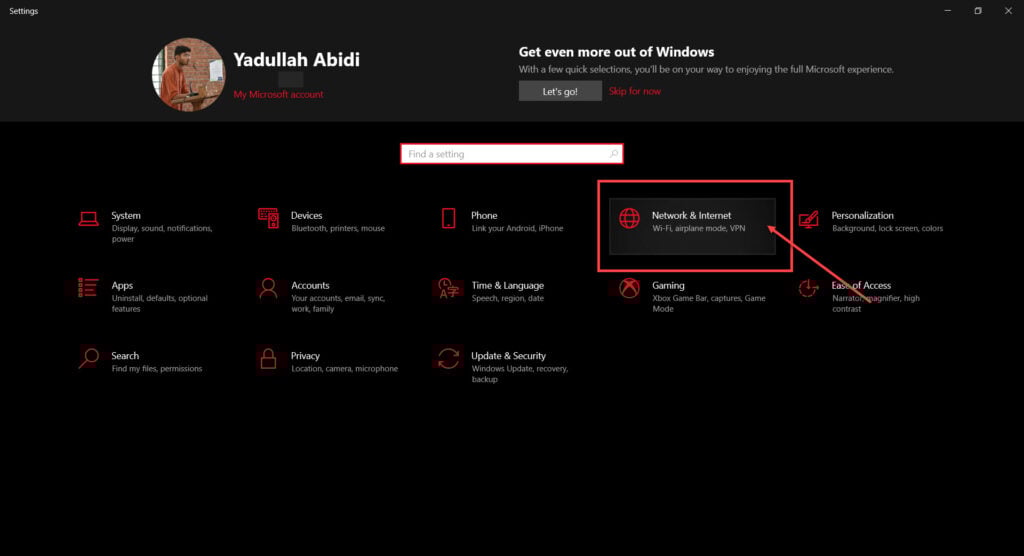
Step 3: Click on Change adaptor options.
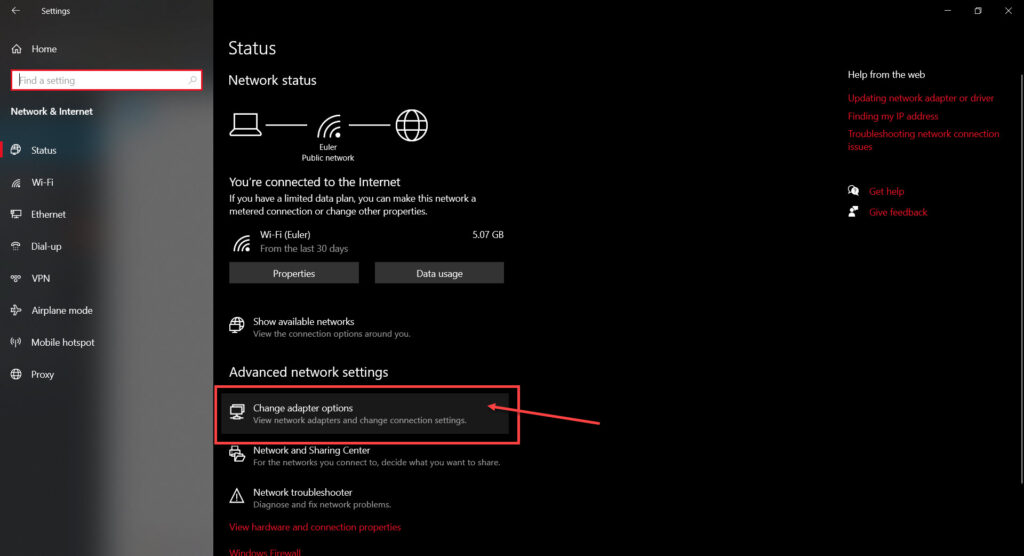
Step 4: Right-click on your Wi-Fi network and click Properties.

Step 5: Find Internet Protocol Version 4 in the list, click on it and then click Properties.
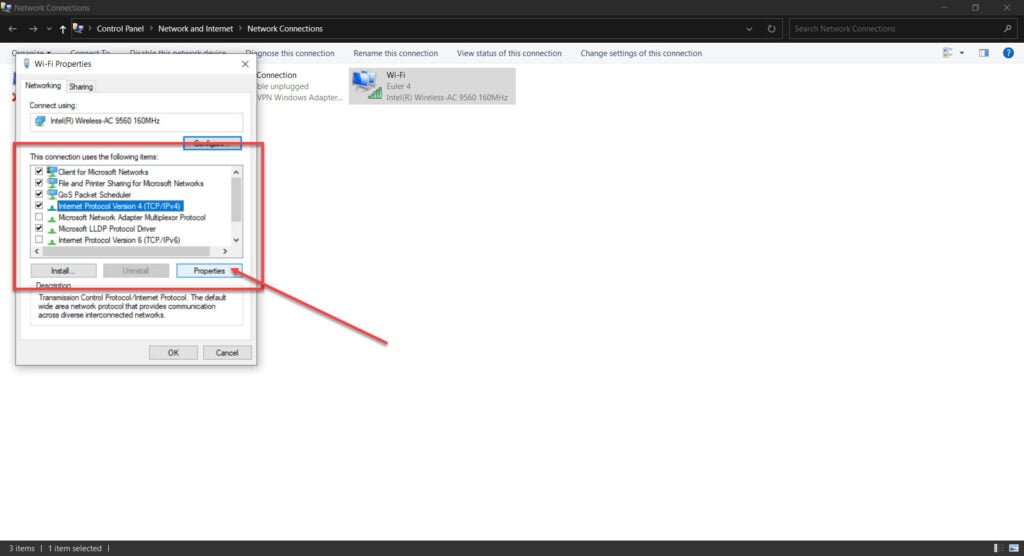
Step 6: Make sure that all settings are set to automatic.

Now reconnect to your network, and it should connect seamlessly.
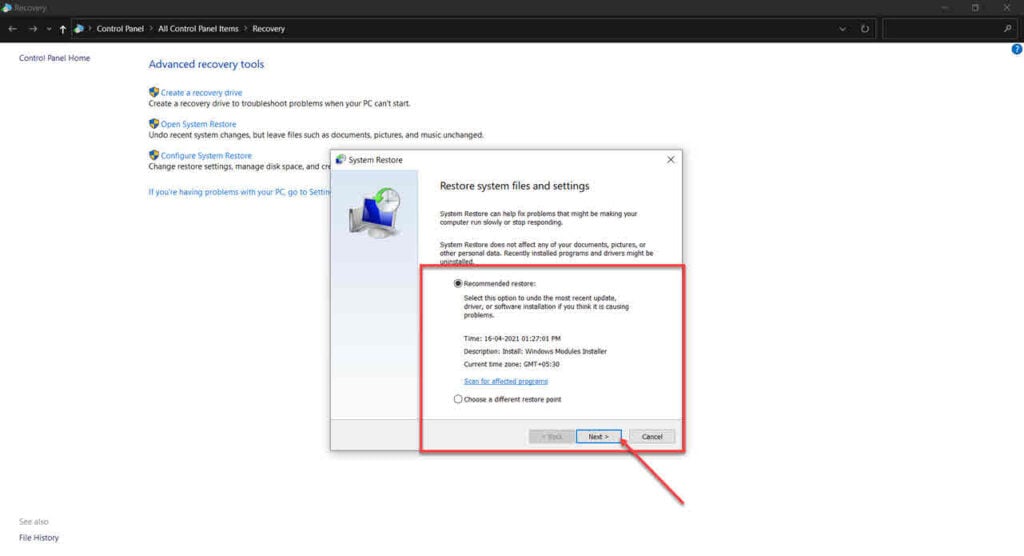
Run system restore
Lastly, if nothing else works, try restoring your system to a previous point where it was functioning properly.
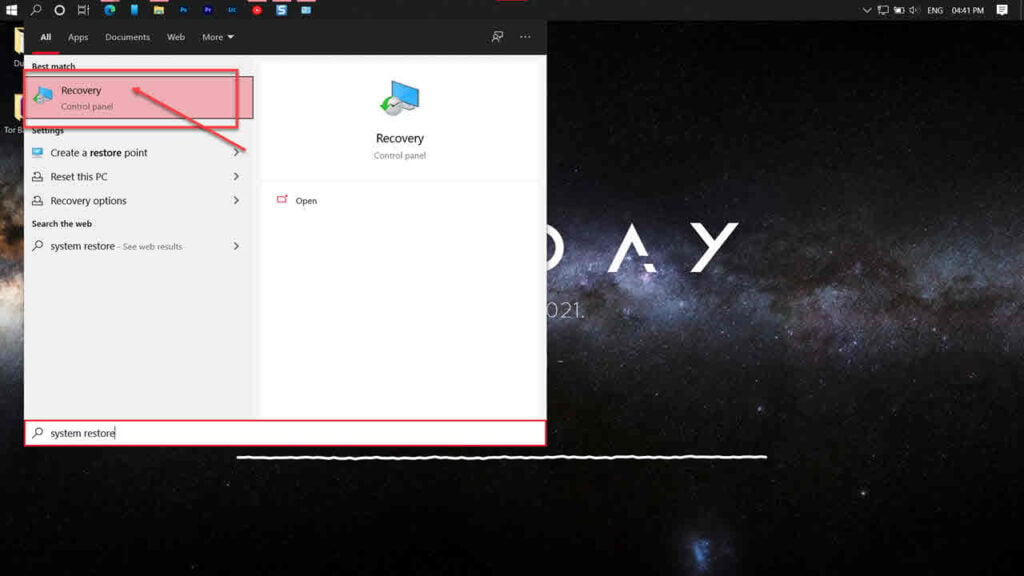
Step 1: Press the Windows key and search for Reset this PC. Then, launch the Recovery setting from the search results.
Step 2: Click on Open System Restore.
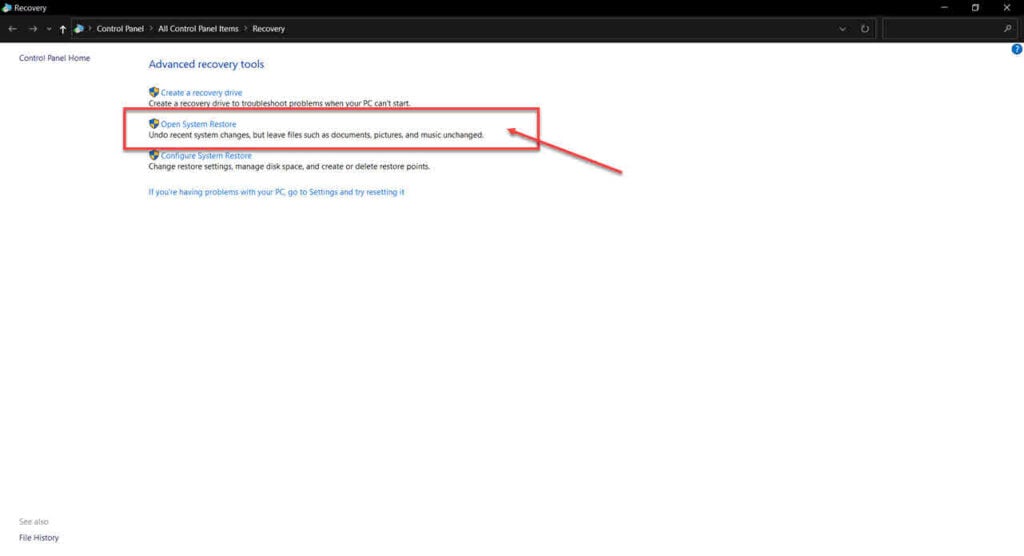
Step 3: Select the recommended restore point and click the Next button to proceed.
Also read: Honeywell thermostat not working: Quick Fix


